Set up your Liquibase GitHub Action
Last updated: November 18, 2025
The setup-liquibase GitHub action simplifies how you integrate Liquibase into your CI/CD automation pipeline. setup-liquibase installs Liquibase on your ephemeral runner of choice and lets you run any command directly in your GitHub workflow. This approach gives users who are already Liquibase and GitHub users more flexibility and full access to Liquibase's command-line capabilities. Rather than managing multiple specialized GitHub actions for different Liquibase commands, you can install Liquibase and run any command you need—whether that's update, rollback, diff, or any other operation. This gives you the flexibility to build sophisticated workflows while maintaining the simplicity of a single action to manage.
This workflow replaces our historic GitHub micro actions.
Learn more about the concept of GitHub actions here.
Before you begin
If you are using a self-hosted runner, ensure Java 8+ is installed since Liquibase is a Java application. GitHub-hosted runners have Java pre-installed, but self-hosted runners may not.
Procedure
Follow these steps to apply the setup-liquibase GitHub action.
Navigate to your GitHub repo that manages your Liquibase workflows.
This repo contains your core Liquibase files, such as your changelogs, migration scripts, liquibase.properties file, flow files, and more.
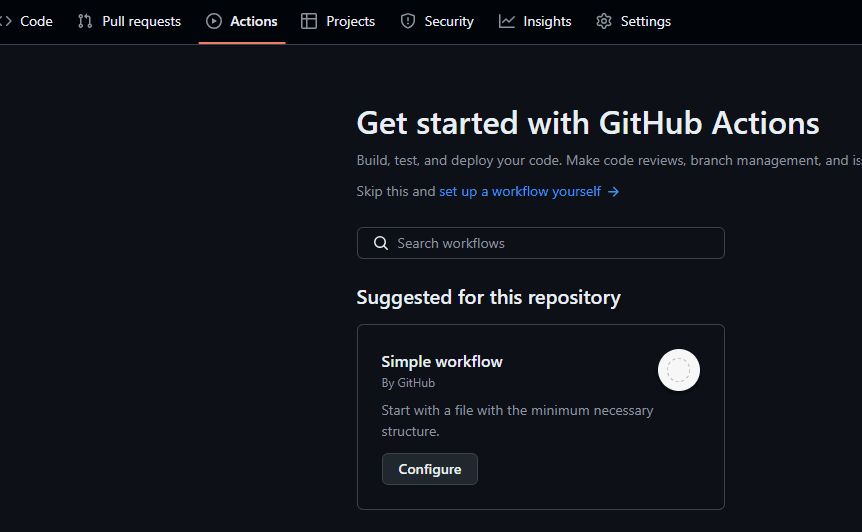
Select the Actions tab and then the Configure button on the Simple workflow card.
From the boiler plate YAML workflow file, commit the changes to create your initial workflow file.
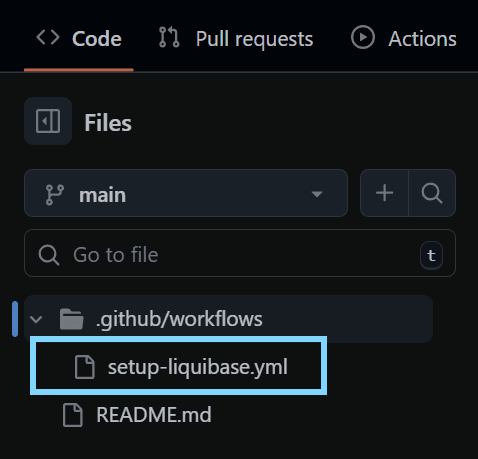
Open the YAML file just created in the left navigation.
Add the code below to the YAML workflow file to install Liquibase to your ephemeral runner.
This code installs the specified version of Liquibase into the ephemeral runner environment and runs any Liquibase command you specify.
Ensure that the version and edition are specified correctly in the file. This feature is compatible with Liquibase 4.32 and later, and the editions are backward compatible, so you can specify any of these and they will work.
Version | Valid matching editions |
|---|---|
|
|
|
|
|
|
|
|
Ensure you specify all Liquibase commands that you want to run in your workflow.
In this example, we run liquibase --version to confirm the correct version runs.
this YAML installs Liquibase and runs the --version command:
Decide to use a GitHub runner or a self-hosted runner and specify the runner in your YAML file.
Each time a runner is enabled, Liquibase is temporarily installed while the runner is active. The environment is deleted once the job is done and the workflow is complete.
Option 1: GitHub runner users:
Specify your runner in the GitHub workflow. Ensure you replace the runner with the correct runner in the code.
Most users will specify ubuntu-latest, windows-latest, or mac-13, but if you don't know which runner to use, pick from this list of GitHub runners to add to the workflow.
GitHub runner example:
Option 2: Self-hosted runner users:
Add the code below to your GitHub workflow file. The main items to pay attention to are the runs-on: section and the steps section. Ensure that self-hosted is listed along with your operating system and bit architecture.
Self-hosted runner example:
Commit your changes to the YAML workflow file.
Navigate back to the Actions tab to see that the action was successful.
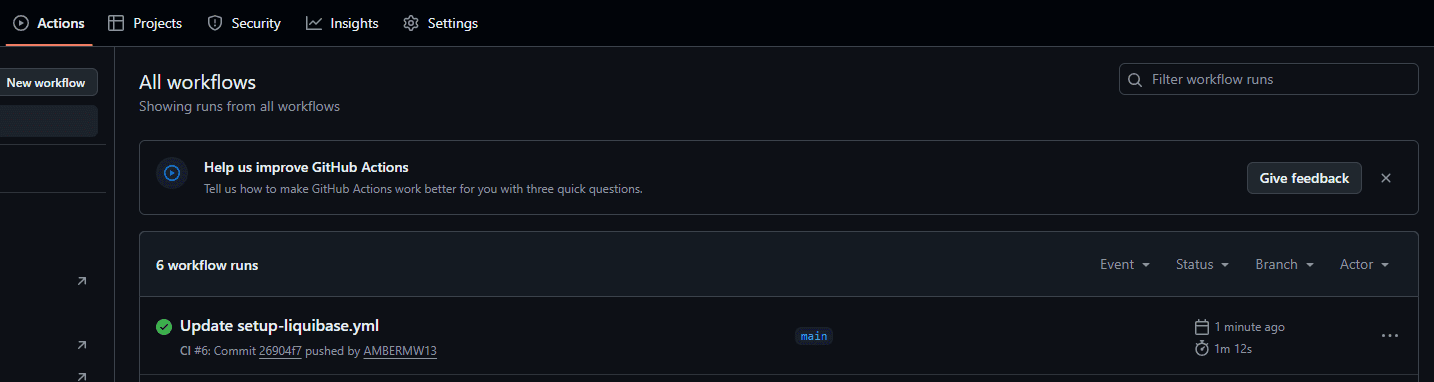
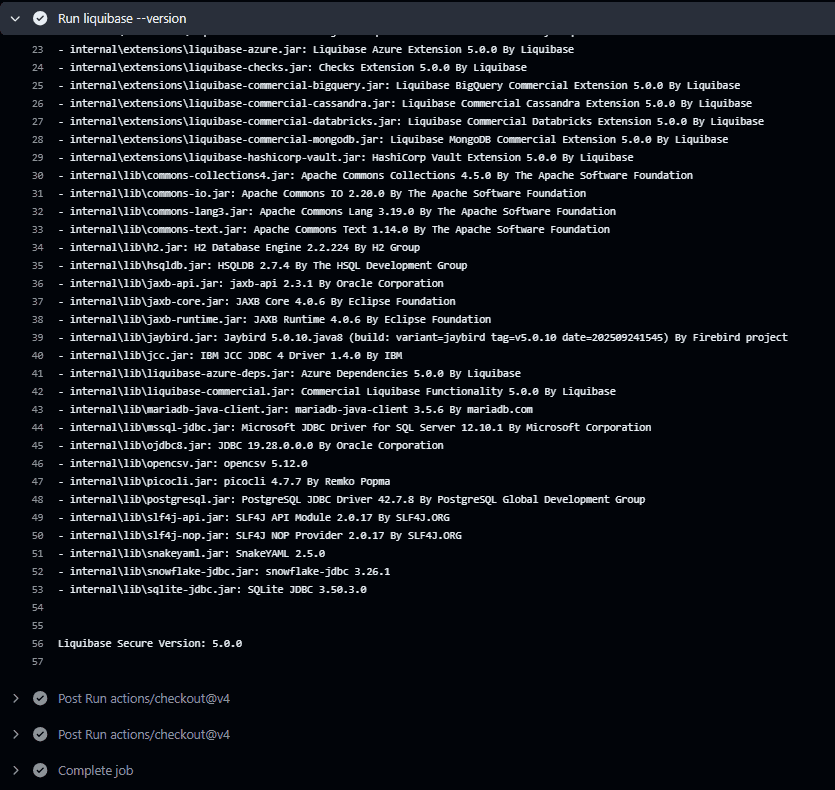
Confirm the workflow logs are accurate.
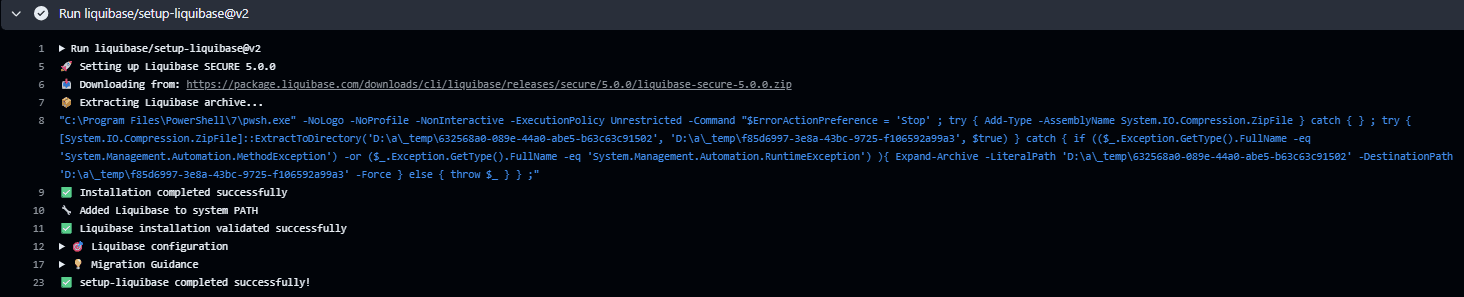
When you click on the Action, you will notice that the YAML file has successfully run. Click on the build to view the logs. Notice that Liquibase was installed successfully, and its version of Liquibase is 5.0.0, as we specified in the YAML workflow.
Results
The GitHub Action succeeded if the logs show both a successful Liquibase installation and successful command execution.