- Task
- Version · 6.0
- Manage
Register a changelog
Last updated: October 9, 2026
Register a changelog repository in Liquibase Server.
Before you begin
These steps happen in the Liquibase Server web application.
A running server, its URL from your administrator, and a user account. See Manage your account.
If the server is not set up yet, run Liquibase Server locally on your own machine or use an internally deployed server. Both guides are under Set up and configure Liquibase Secure server.
Procedure
Open the Changelogs dashboard
In the left navigation, select Changelogs. This opens the main list of changelogs belonging to your organization.
Open the creation form
In the top right corner, select + New Changelog.
Fill out Basic Information
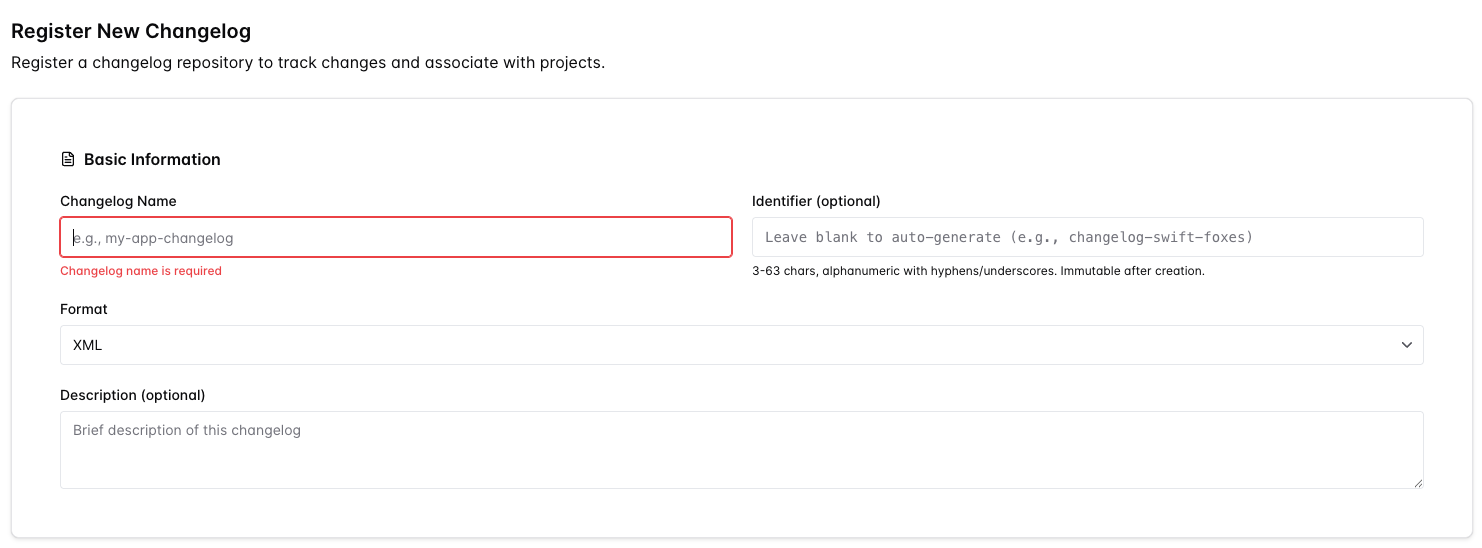
Field | Description |
|---|---|
Changelog Name | A display name for the changelog. |
Identifier (optional) | A unique identifier for the changelog. Leave blank to auto-generate one. Must be 3–63 alphanumeric characters with hyphens or underscores. Immutable after creation. |
Format | The format of your changelog file. For example, |
Description (optional) | A brief description of the changelog. |
Fill out Git Repository Details
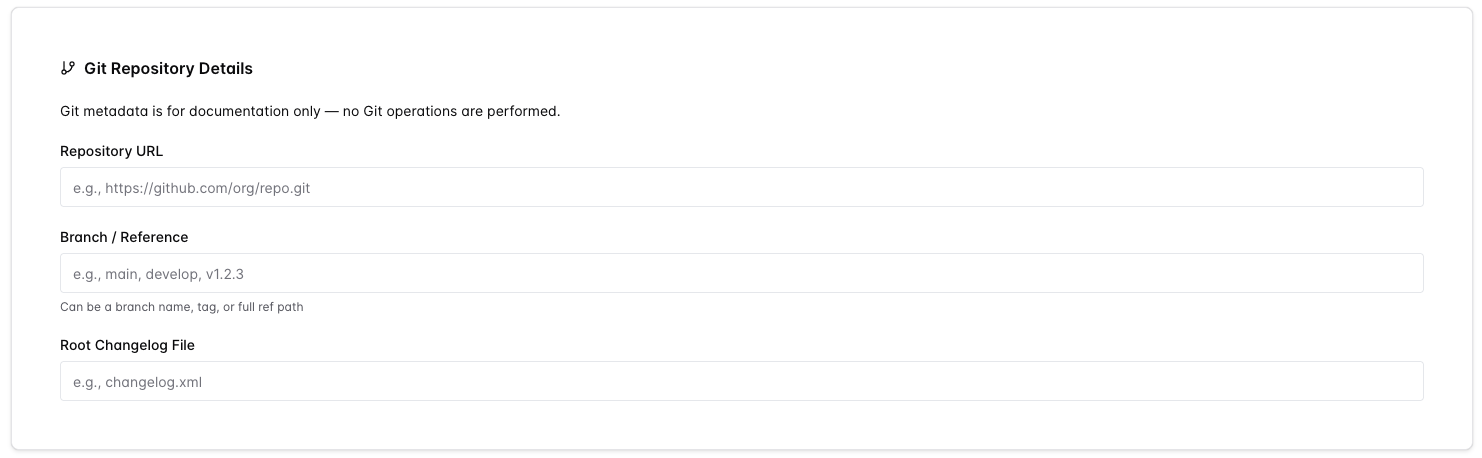
Git metadata is for documentation only. No Git operations are performed.
Field | Description |
|---|---|
Repository URL | The URL of the Git repository that contains the changelog. For example, |
Branch / Reference | The branch name, tag, or full ref path. For example, |
Root Changelog File | The path to the root changelog file. For example, |
Associate with projects (optional)
Under Project Associations, select the projects you want to associate this changelog with. You can search by project name. If the project has not been created yet, you can skip this step and add the association later.
Create the changelog
Select the Create Changelog button.
Link your Liquibase runs to this changelog
Creating the changelog record does not connect it to anything by itself. The link is made from the CLI side: copy the Identifier shown on the changelog details page (whether you chose it or it was auto-generated) and set it on every Liquibase instance that runs this changelog:
LIQUIBASE_PLATFORM_CHANGELOG_IDENTIFIER=your-identifier as an environment variable, or liquibase.platform.changelogIdentifier in your properties file.
From the next run onward, every operation is attributed to this changelog and appears in the dashboards. If the identifier does not match a changelog in your workspace, the operation is still captured but ships unattributed rather than being linked to the wrong record.