- Task
- Your first governed database change
Your first governed database change
Last updated: September 29, 2026
Before you begin
In this walkthrough you assign a policy on Liquibase Secure server, run it against the H2 sandbox from the command line, and find the run recorded in the web app.
Nothing you do here reaches a real environment. This workspace uses sample data, and the database is the bundled H2 sandbox, so you can try the whole flow and throw it away afterwards.
Before you begin
Start Docker Desktop. The server runs as a set of containers, and the installer stops if Docker is not running.
Check the Liquibase Secure server requirements for the machine you install it on.
If you have not installed Liquibase yet, start with run Liquibase against the H2 sandbox. This walkthrough picks up from the project it leaves you with.
If you are setting the server up for your team rather than trying it out, start with what Liquibase Secure server is.
If your company already runs the server and you only want the web app, log in to Liquibase Secure server.
Procedure
Start the server
From the folder you extracted, run:
./liquibase-platform installThe CLI runs automatically. It checks prerequisites, generates secrets, pulls images, starts databases, runs migrations, and verifies that the API and web services are healthy. When it is complete the service will print the address of the web app.
  Access URL:  https://localhost
  TLS:         Self-signed certificate
On a local install the address is https://localhost. Give the server a different hostname with --domain, and that becomes both the address of the web app and the name on the certificate. To use your own certificate instead of the self-signed one the installer generates, reinstall with --tls-cert and --tls-key. The command reference covers the rest, including pinning an image tag.
Turn on sample data
Sample data gives you a worked example workspace to govern, with a project, its databases, a changelog and several weeks of deployment history. It is turned off by default.
The installer wrote a .env file into the folder you ran it from, already carrying the setting. Open it and change that line to:
LIQUIBASE_PLATFORM_SAMPLE_DATA=trueRestart the server so it reads the change:
./liquibase-platform stop
./liquibase-platform start
The server reports what it created as it starts.
This is example data rather than a trial data set. It is safe to turn on for a server that already holds real records, because it only adds its own, and it is provisioned once for a workspace, so restarting does not duplicate it.
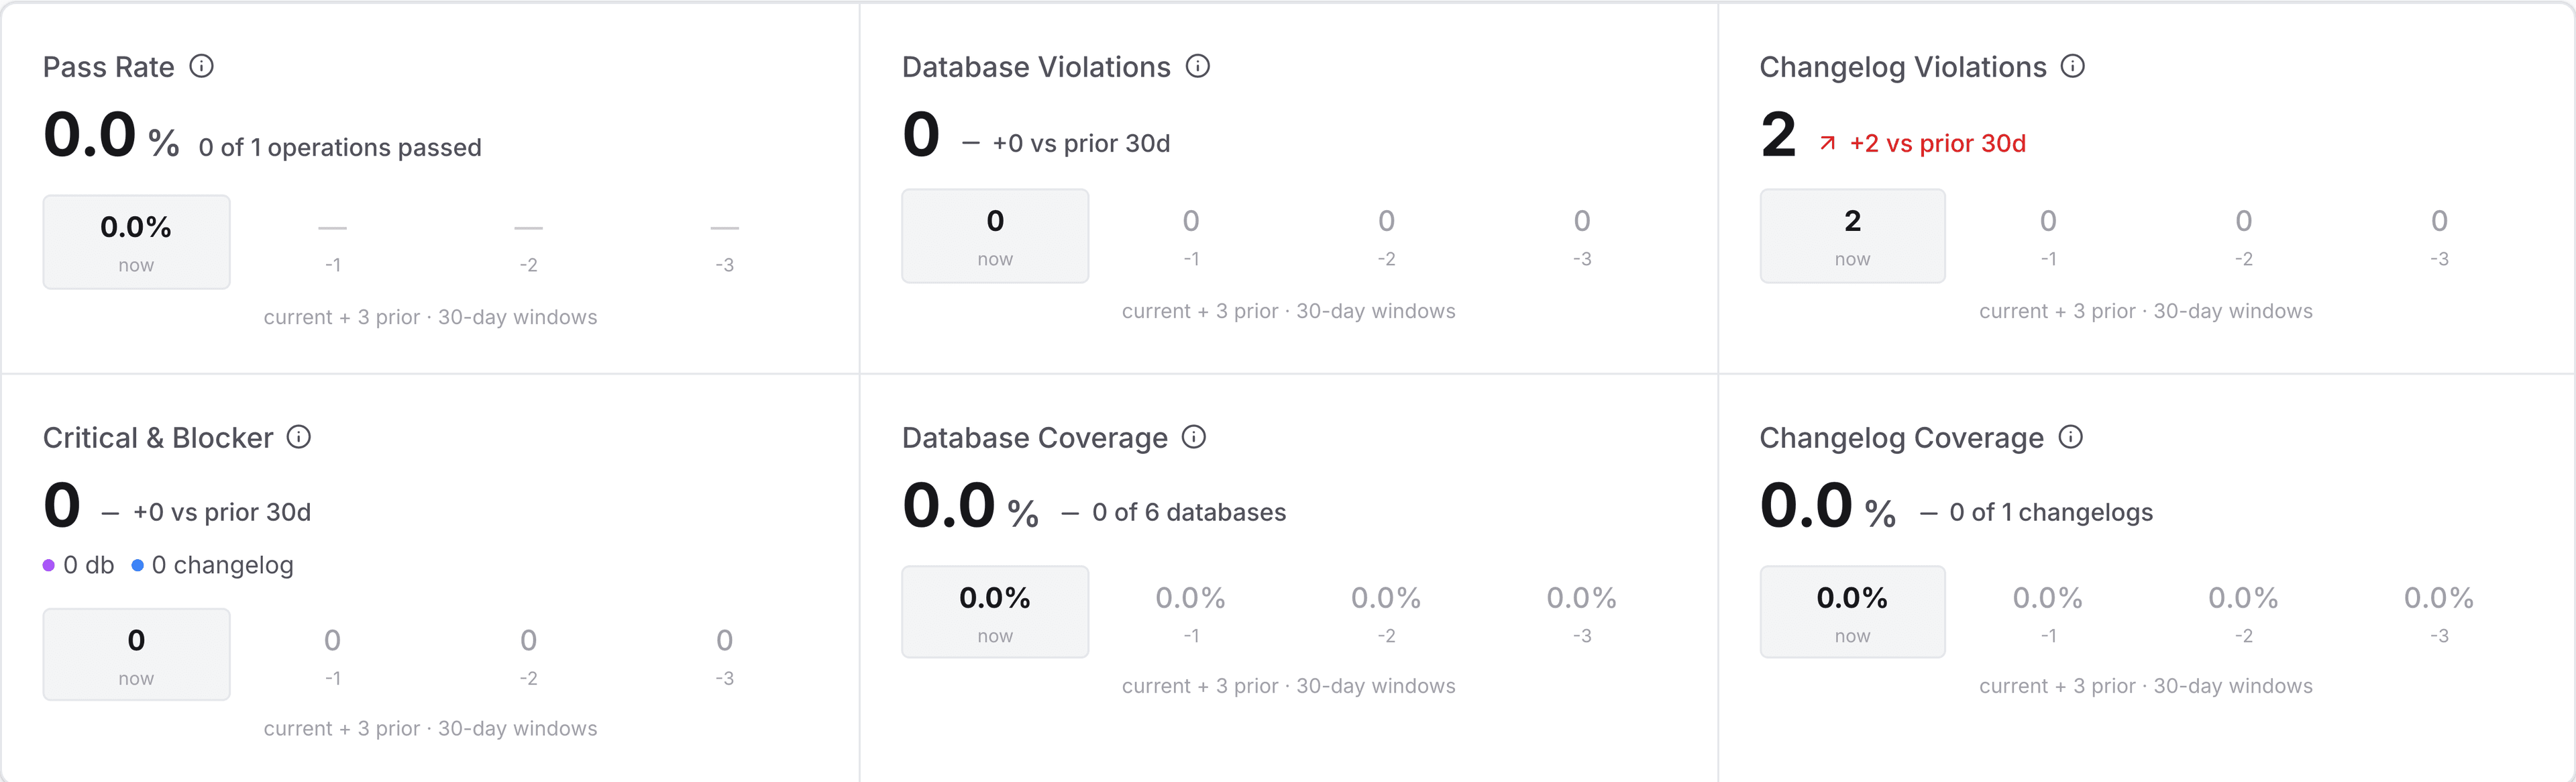
Note: sample deployments are counted in the dashboard figures along with your own, so the numbers on a populated sandbox describe the example, not your team. Remove the sample data from Settings before you use the server for real work, which is permanent and leaves anything you created untouched.
Open the web app and create your account
Open the address the installer printed. Your browser warns you about the self-signed certificate the first time, which is expected on a local install, so continue past it.
Select Create one under the sign-in form, fill in your name, your email address and a password of at least eight characters, then select Create Account. You are signed in straight away, with no email to confirm.
The first account to register becomes the administrator of this workspace, which is what lets you create the policy assignment and the service principal later in this walkthrough.
Look around the sample workspace
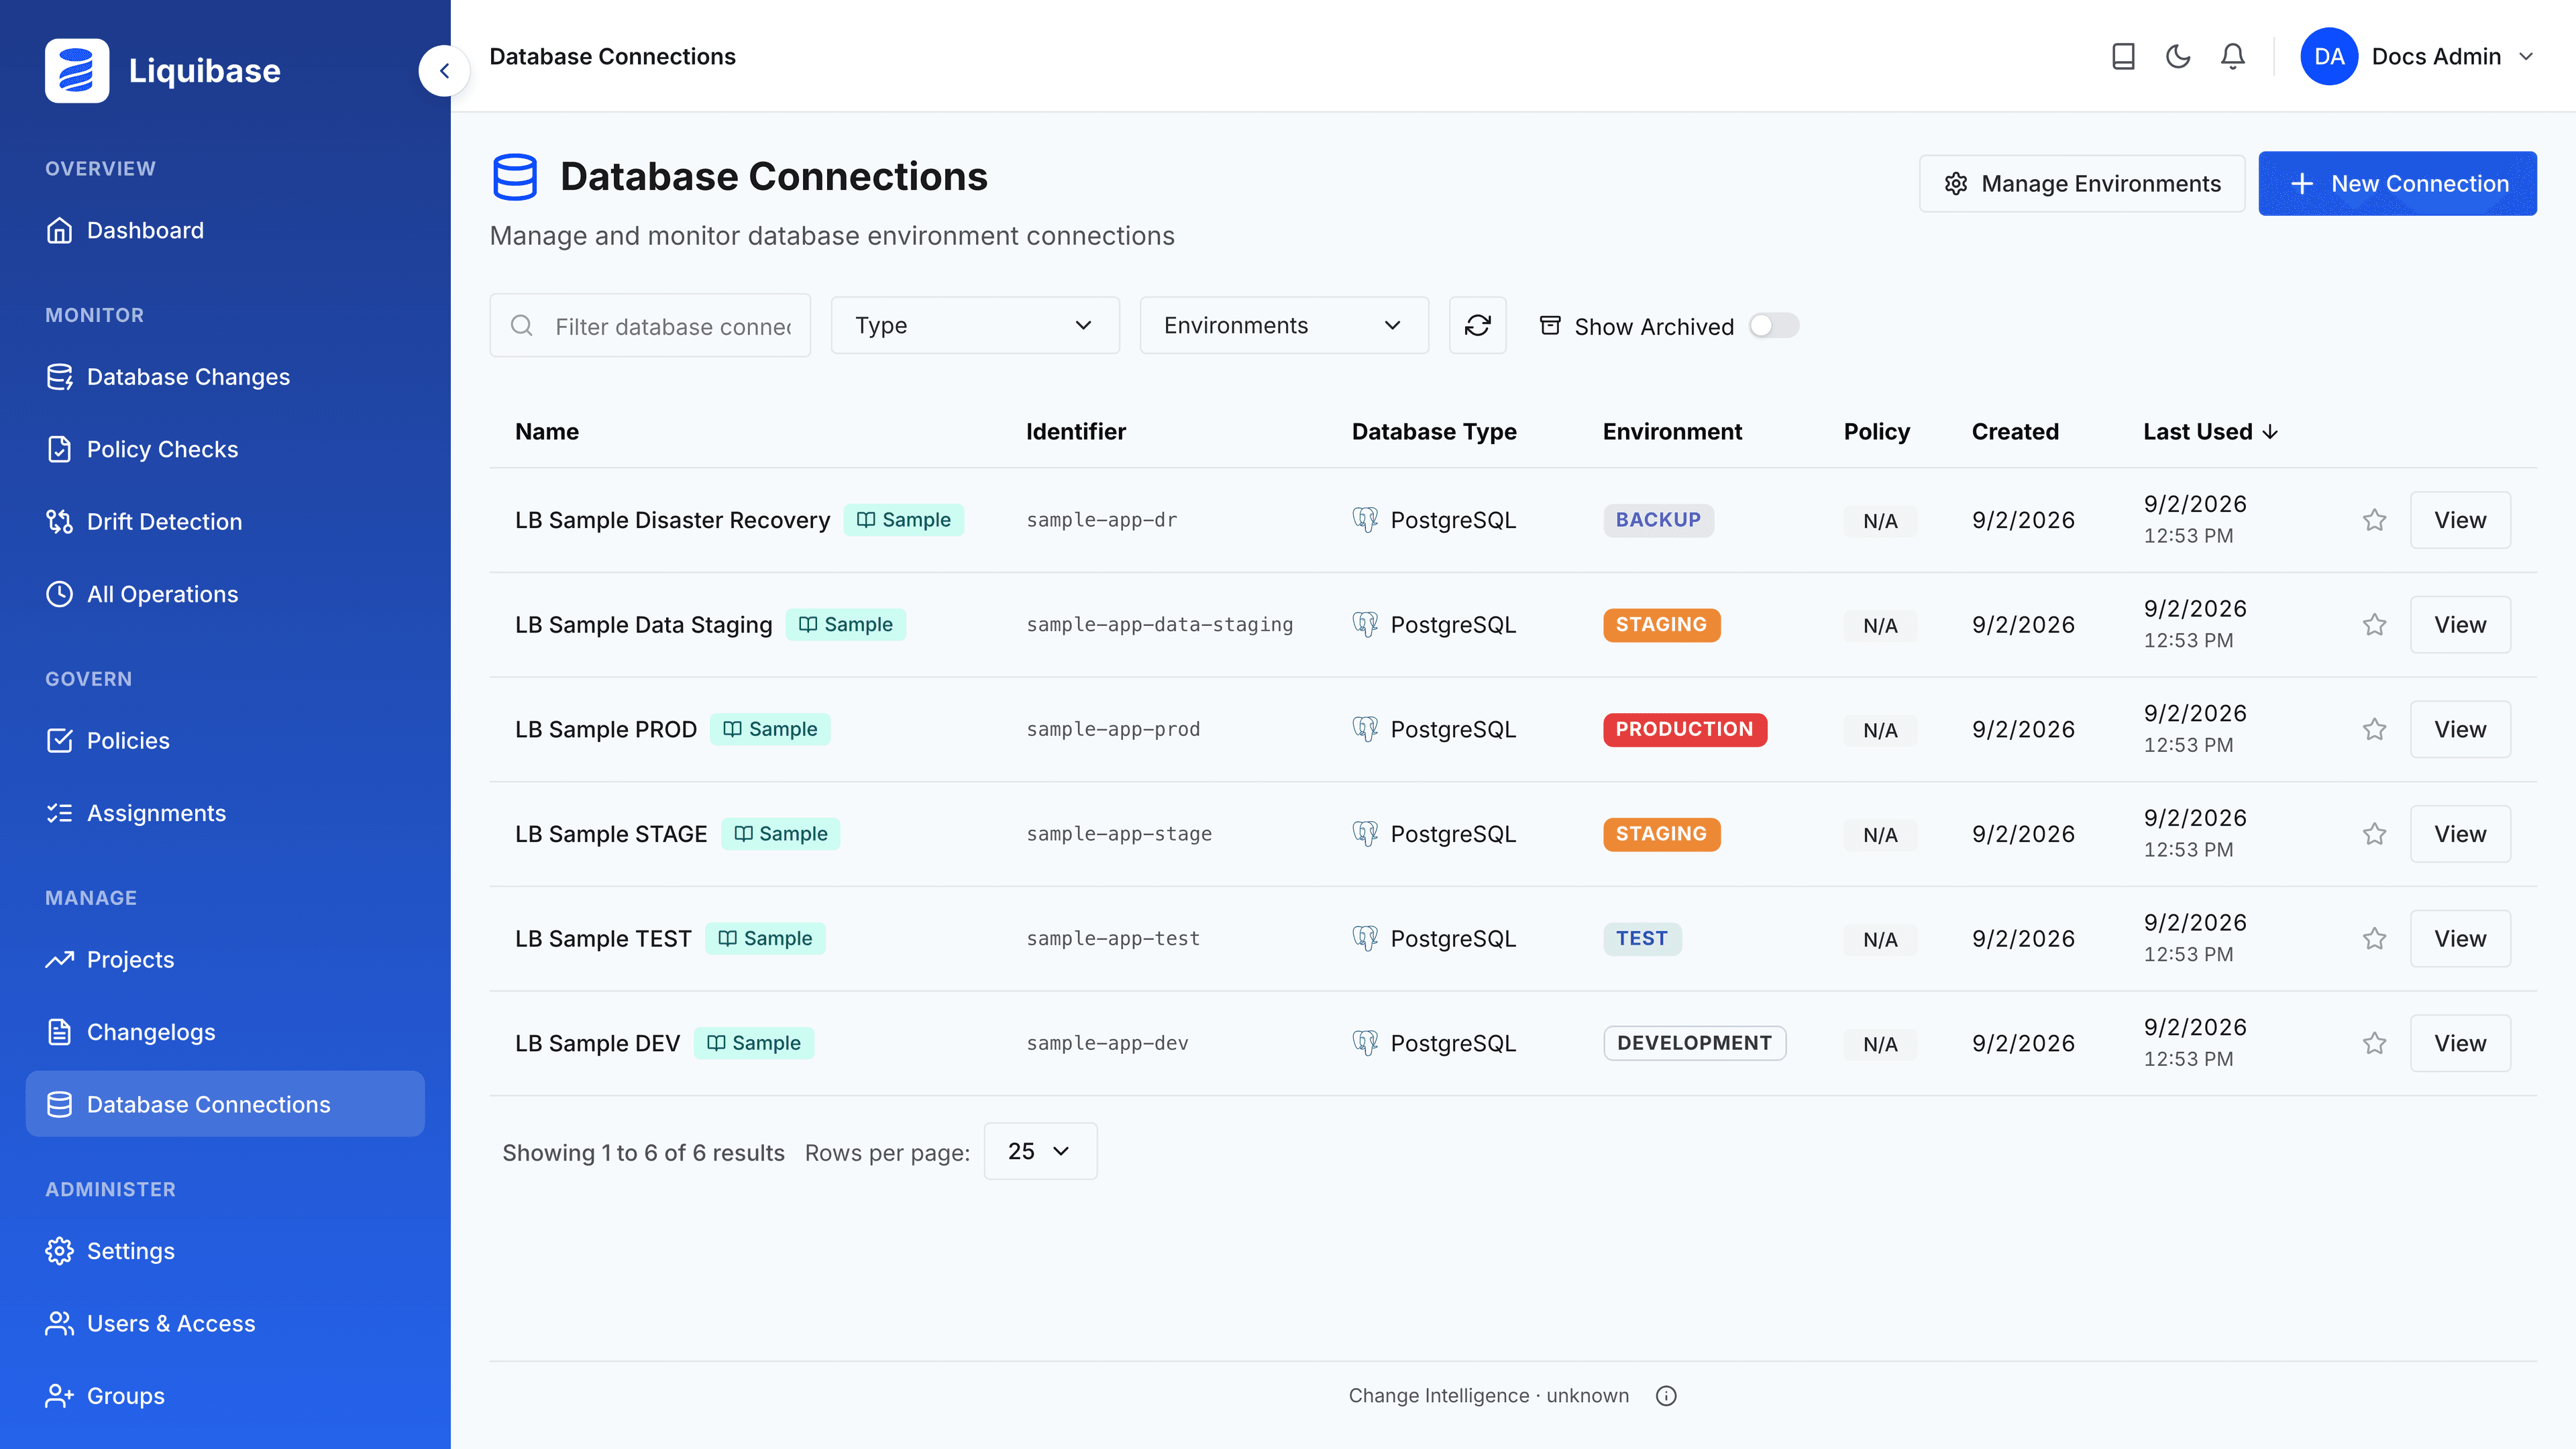
Sign in and open Projects. The workspace holds one project, LB Sample Project, with six database connections, three pipelines and one changelog. Open Database Connections to see how they are laid out.
Four connections follow the same logical database along a promotion path, from development through test and staging to production. Two more sit outside that path, a data staging database and a disaster recovery database, which is the part worth noticing: a project is not just a list of environments.
The project, its connections, its changelog and its pipelines each carry a Sample badge, and the badge stays even if you rename the record, so you can always tell the example apart from your own work.
Find the deployment that failed
Open All Operations under Monitor. The sample workspace comes with several weeks of deployment history that ends today, and not every deployment in it succeeded.
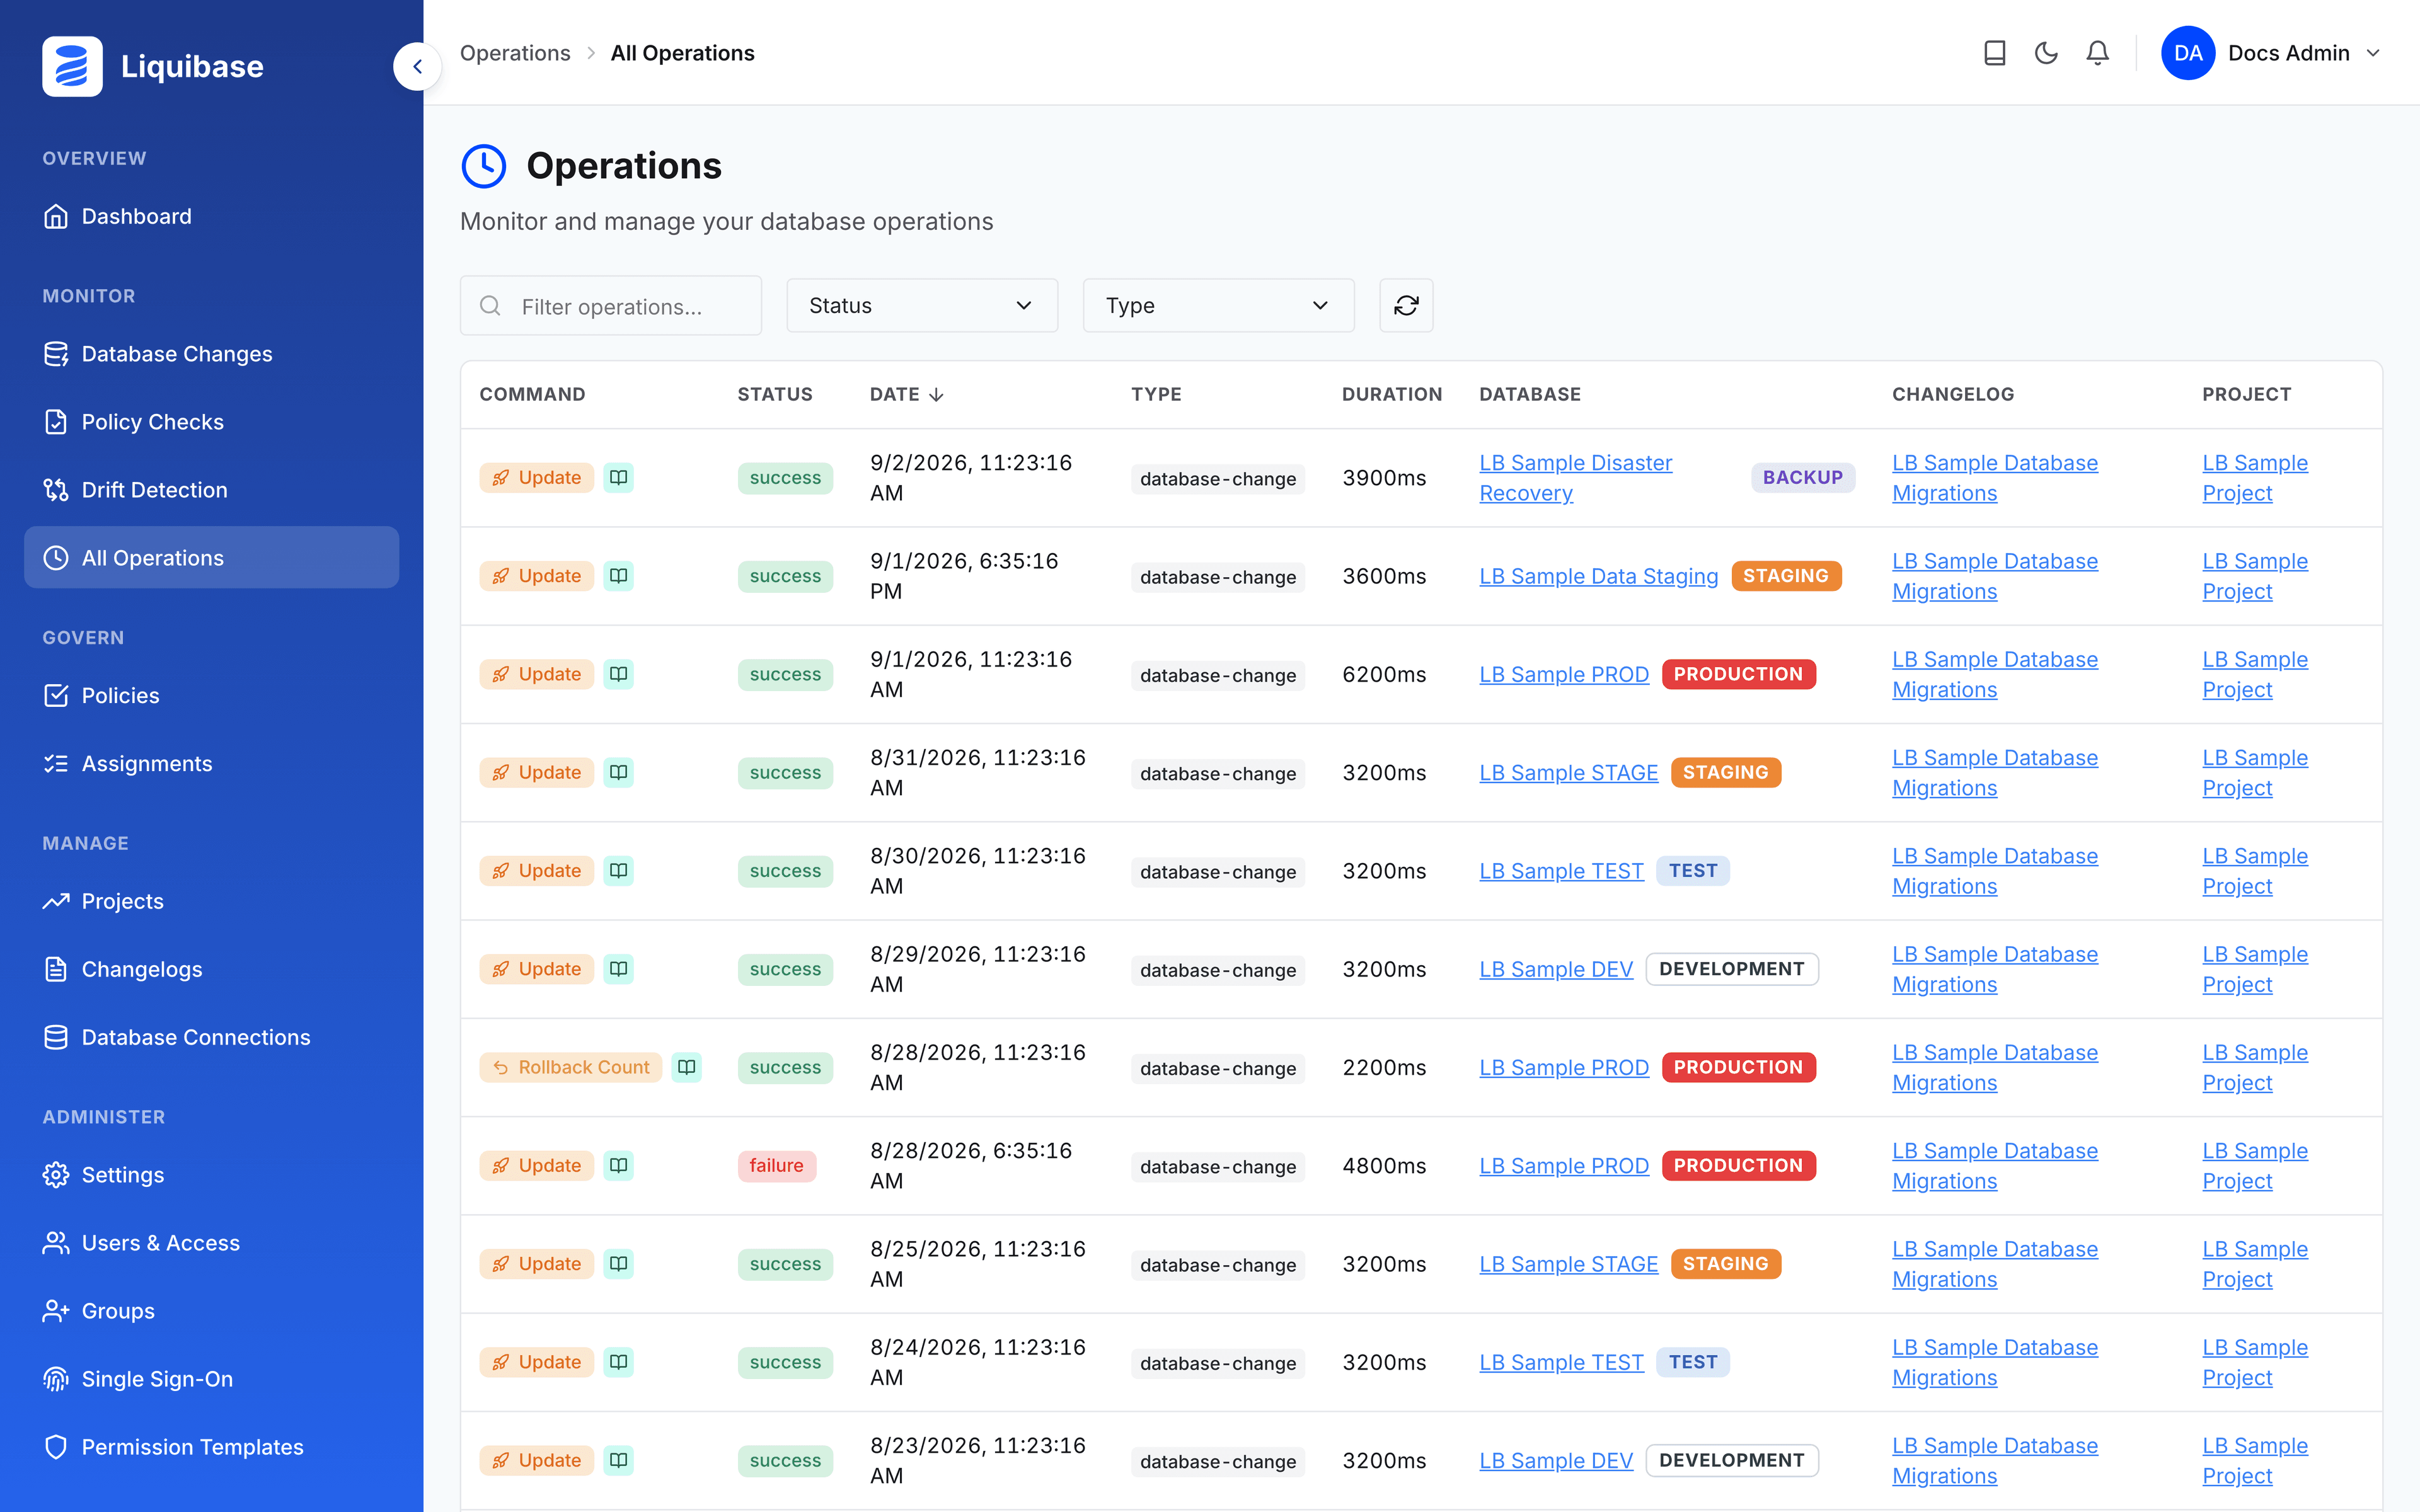
Find the failed update against LB Sample PROD and open it. A changeset tried to add a unique index to a column that already held duplicate values, so the deployment stopped part way through. The rollback that recovered it sits just above in the list.
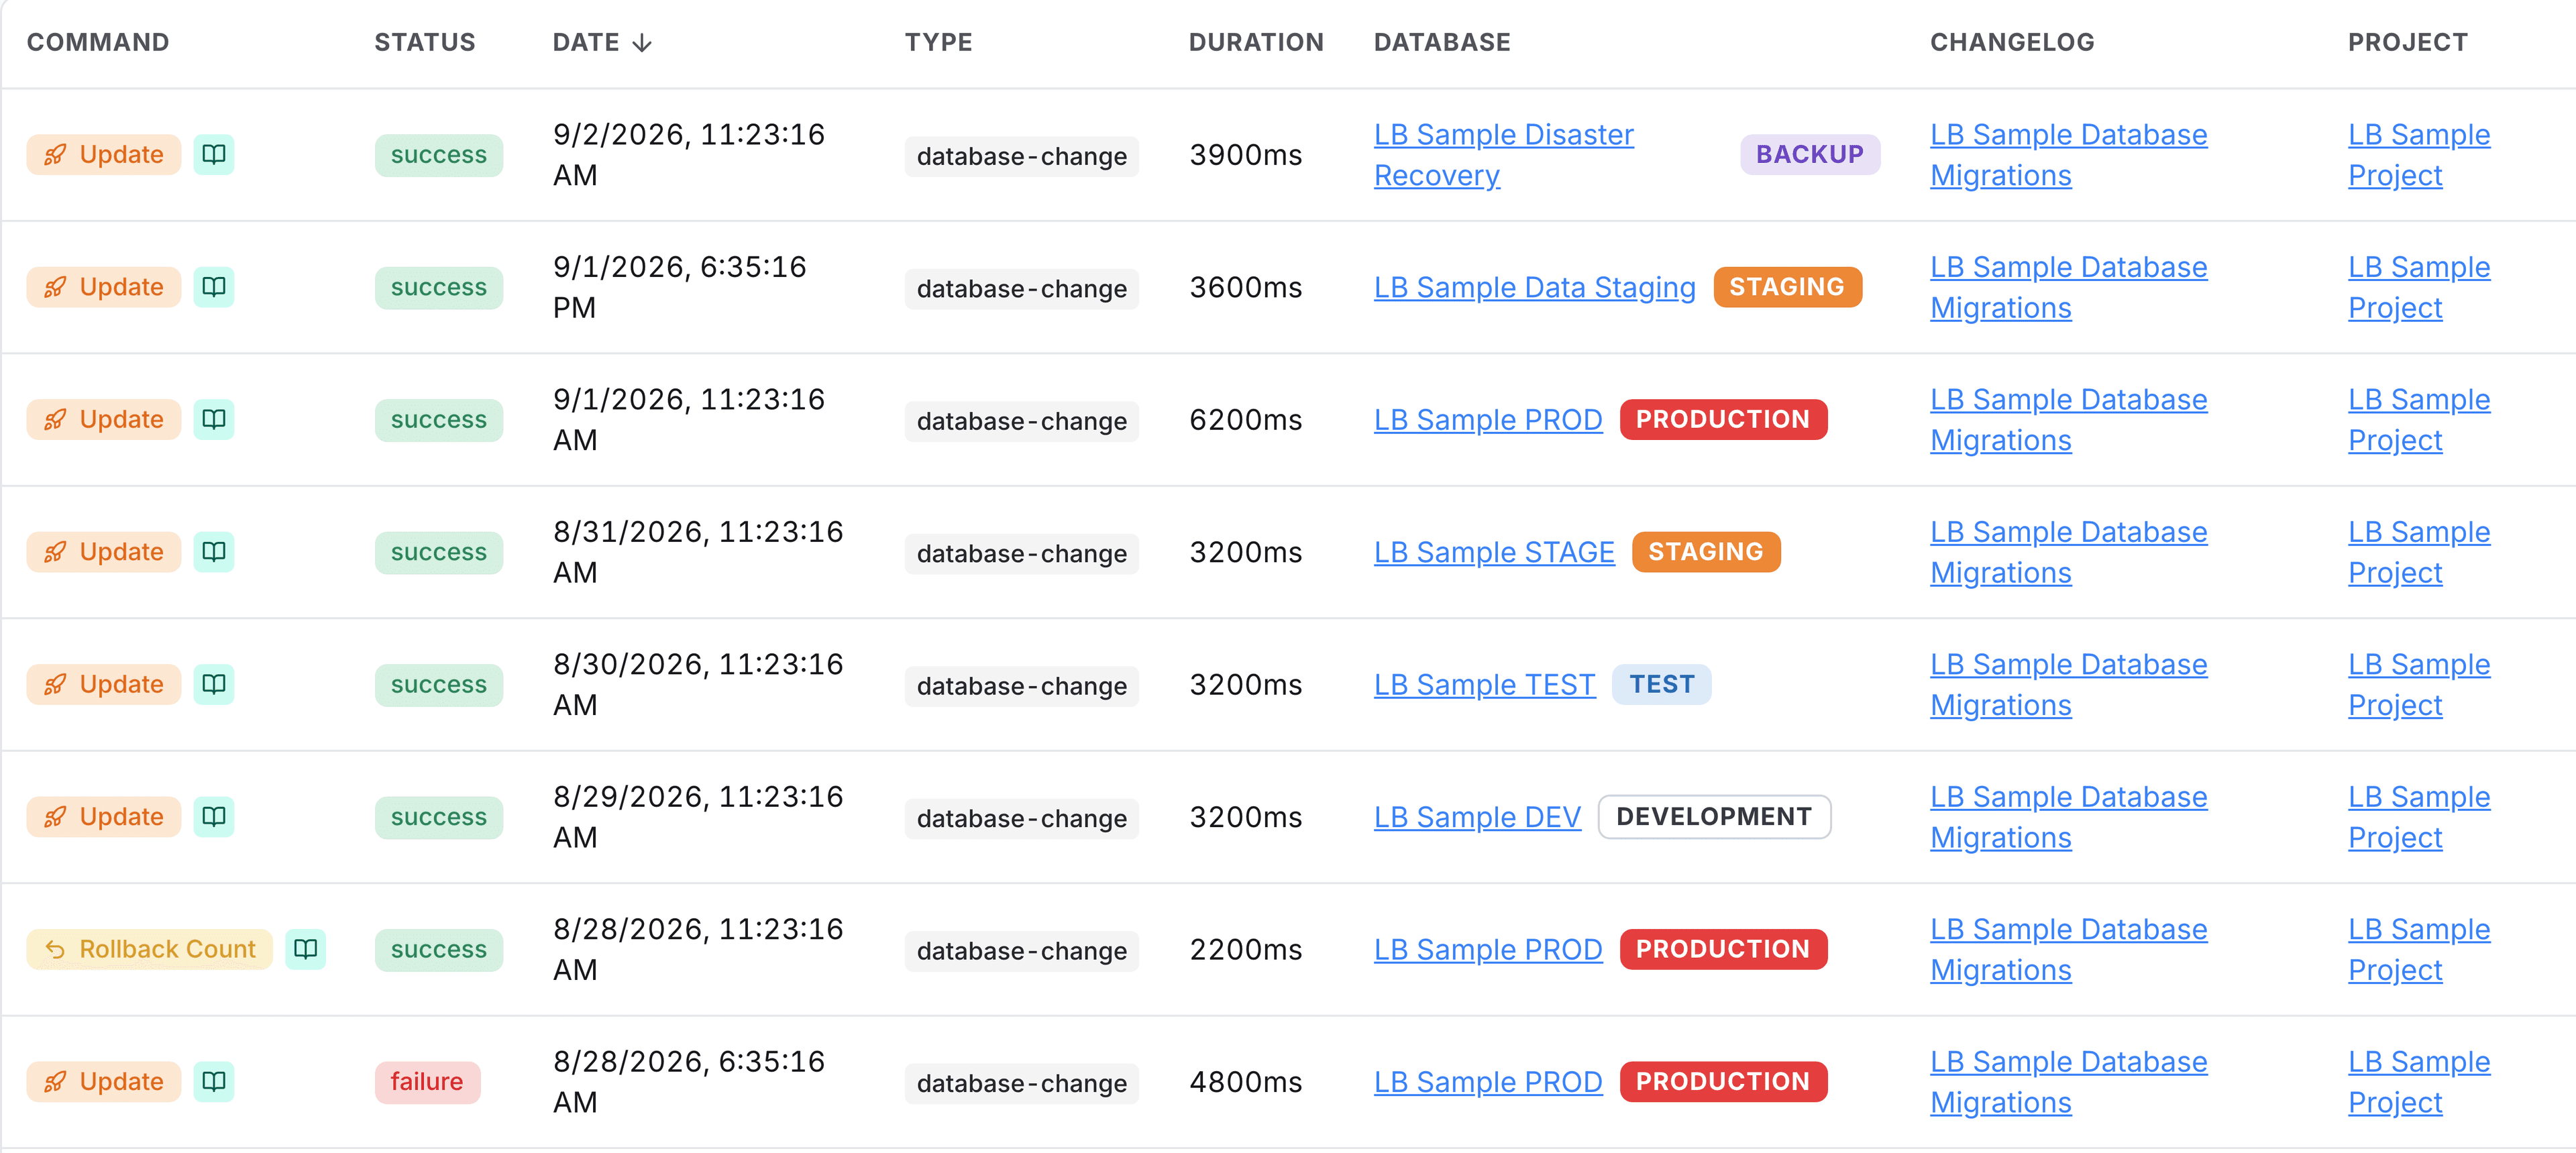
You have now identified a changeset that failed, which database it is connected to, and what actions were taken. The rest of this walkthrough shows you how to catch a problem like that before it reaches a database.
Copy the package into a catalog of your own
Checks live in packages, and packages live in catalogs. The Liquibase Default Catalog is the read-only library Liquibase ships, so you copy what you want out of it into a catalog of your own, where you can change what the checks do.
Under Govern, select Policies to open Manage All Catalogs. Choose Manage on the Liquibase Default Catalog to open a Policy Checks Packages page.
Select + New, choose New Catalog, give it a name, for example Sandbox policies, and select Create catalog.
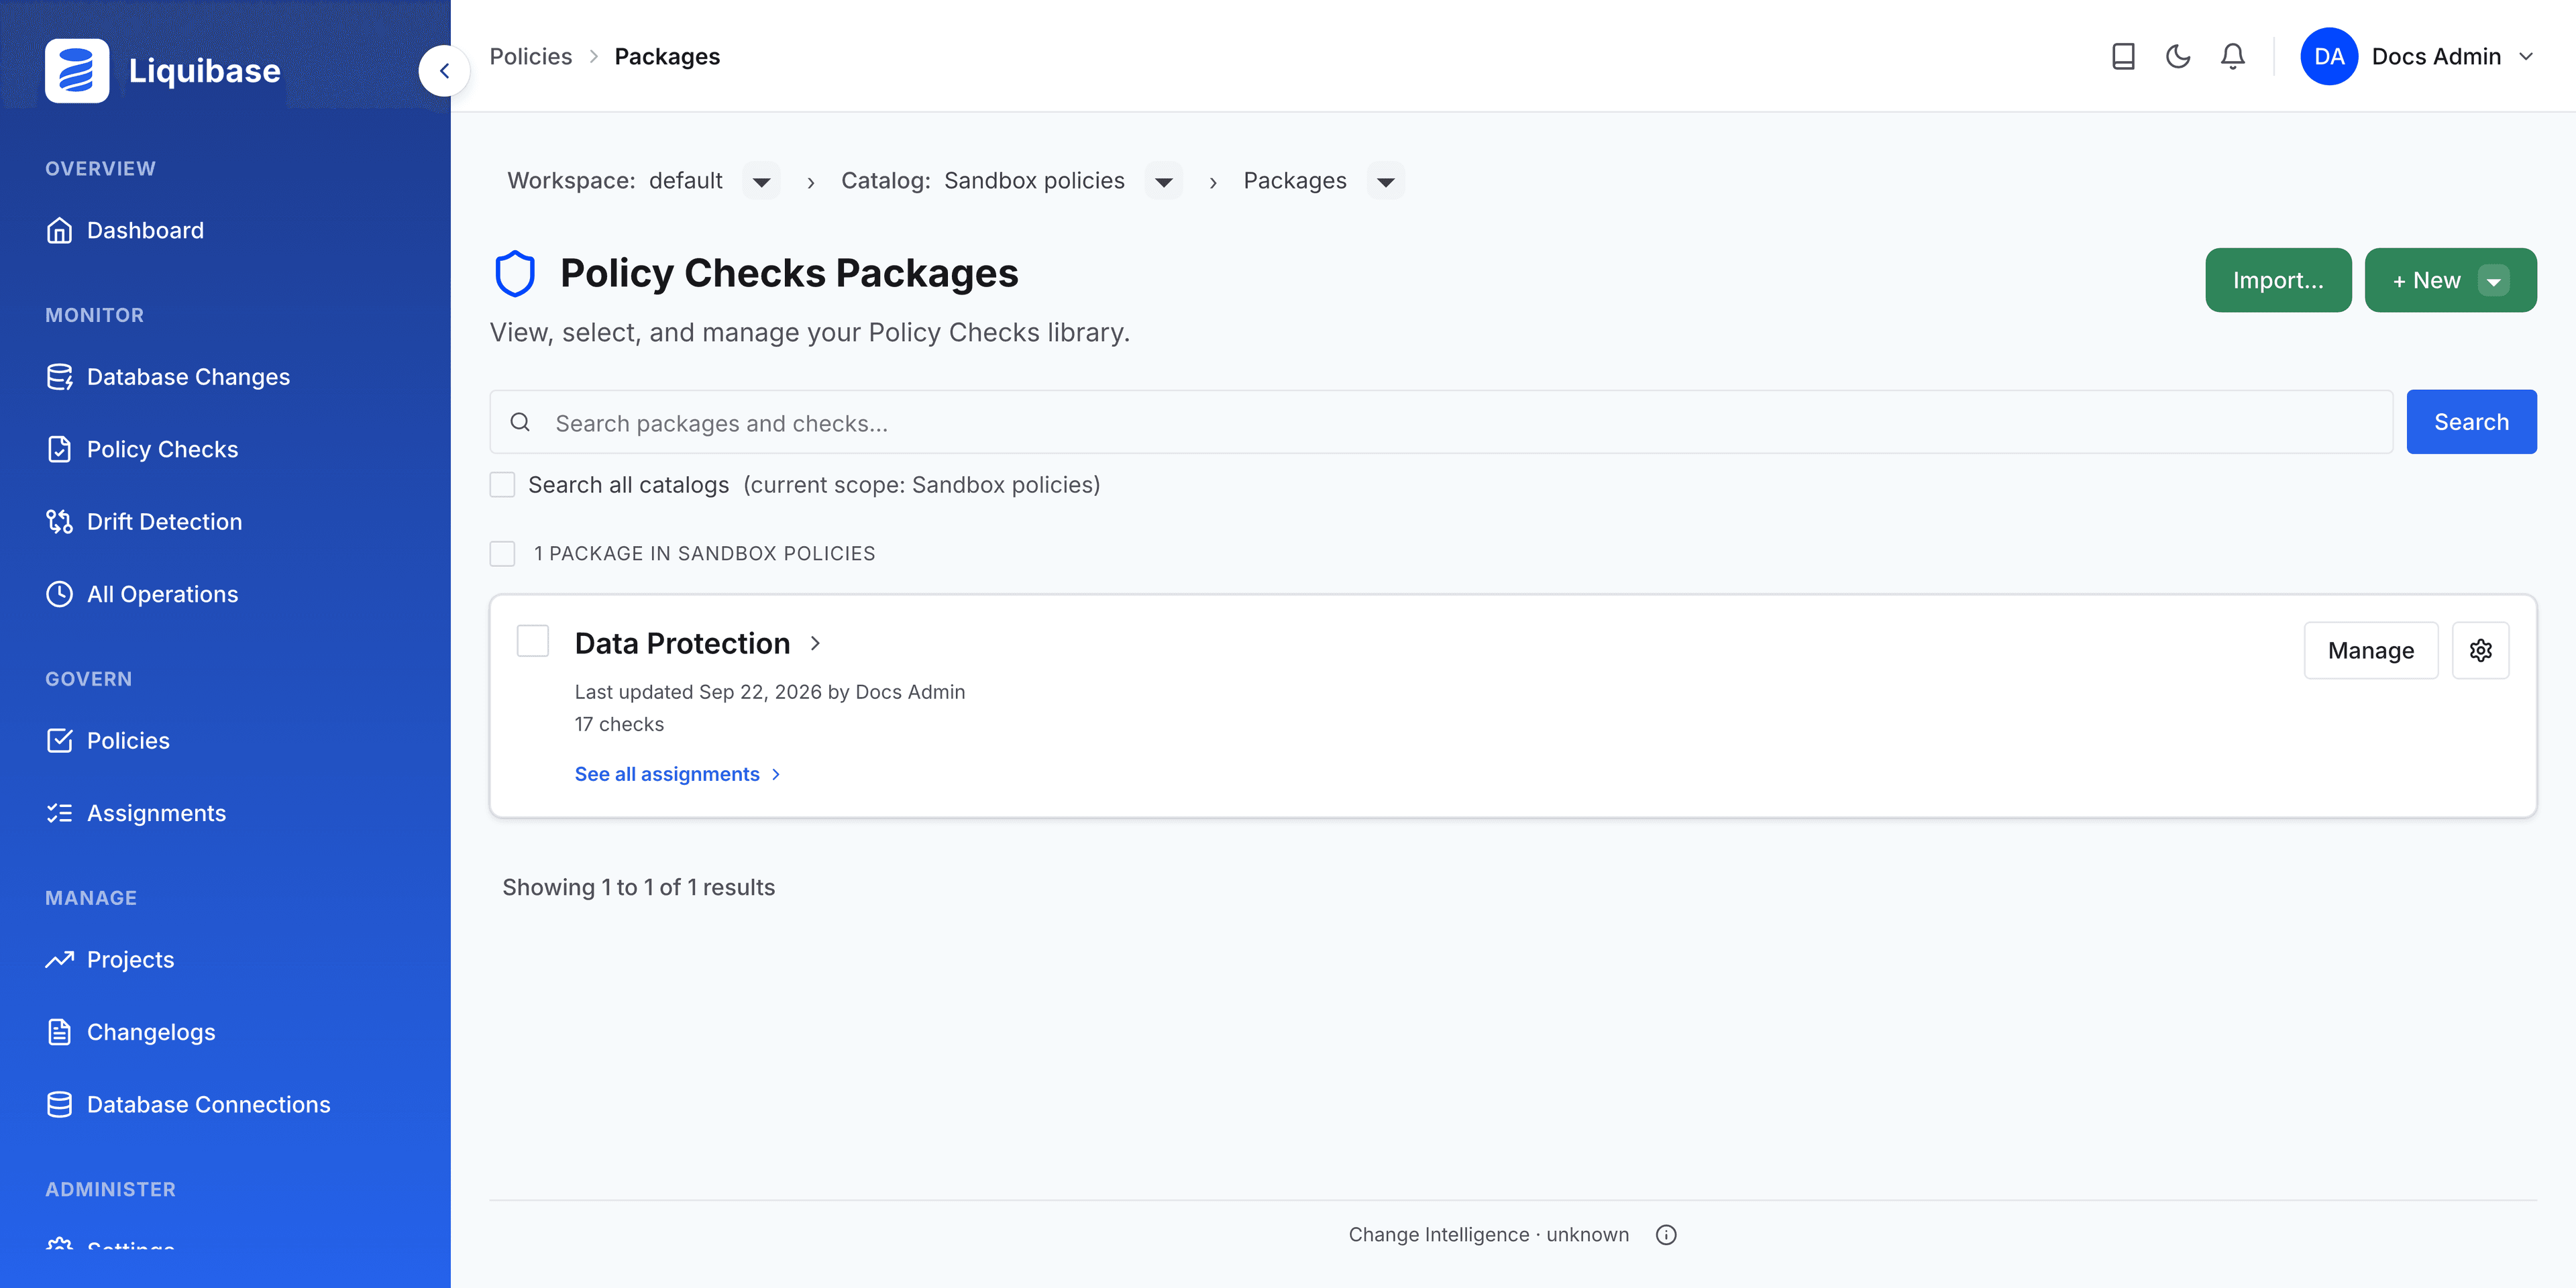
The new catalog opens with the Copy packages into dialog already open. Leave the Liquibase Default Catalog as the source, select the Data Protection package, which guards against destructive changes, and confirm.
Your catalog now holds its own copy of the package. Copies are independent, so what you change here does not affect the built-in catalog, and the built-in catalog stays intact for everyone else.
Raise the severity so the check can stop a deployment
Every check ships at the lowest severity, which returns exit code 0. A run reports the violation and the pipeline carries on. Raising the severity on your copy is what turns the check into something that can stop a deployment.
Open the Data Protection package in your catalog and find Warn when 'DROP TABLE' detected.
Open its configuration, set Severity to 2, and save.
Note: Severity belongs to the check in the catalog, not to the assignment. An assignment carries which checks are on, so the catalog is the only place to change what a check returns. This is also why the built-in catalog cannot be raised: it is read-only.
Assign the package to the sample project
An assignment is what connects a set of checks to the databases and changelogs they apply to. Build one from the package you just prepared:
On your catalog's Policy Checks Packages page, select the checkbox for the Data Protection package, then select Assign. The button appears only after you select a package.
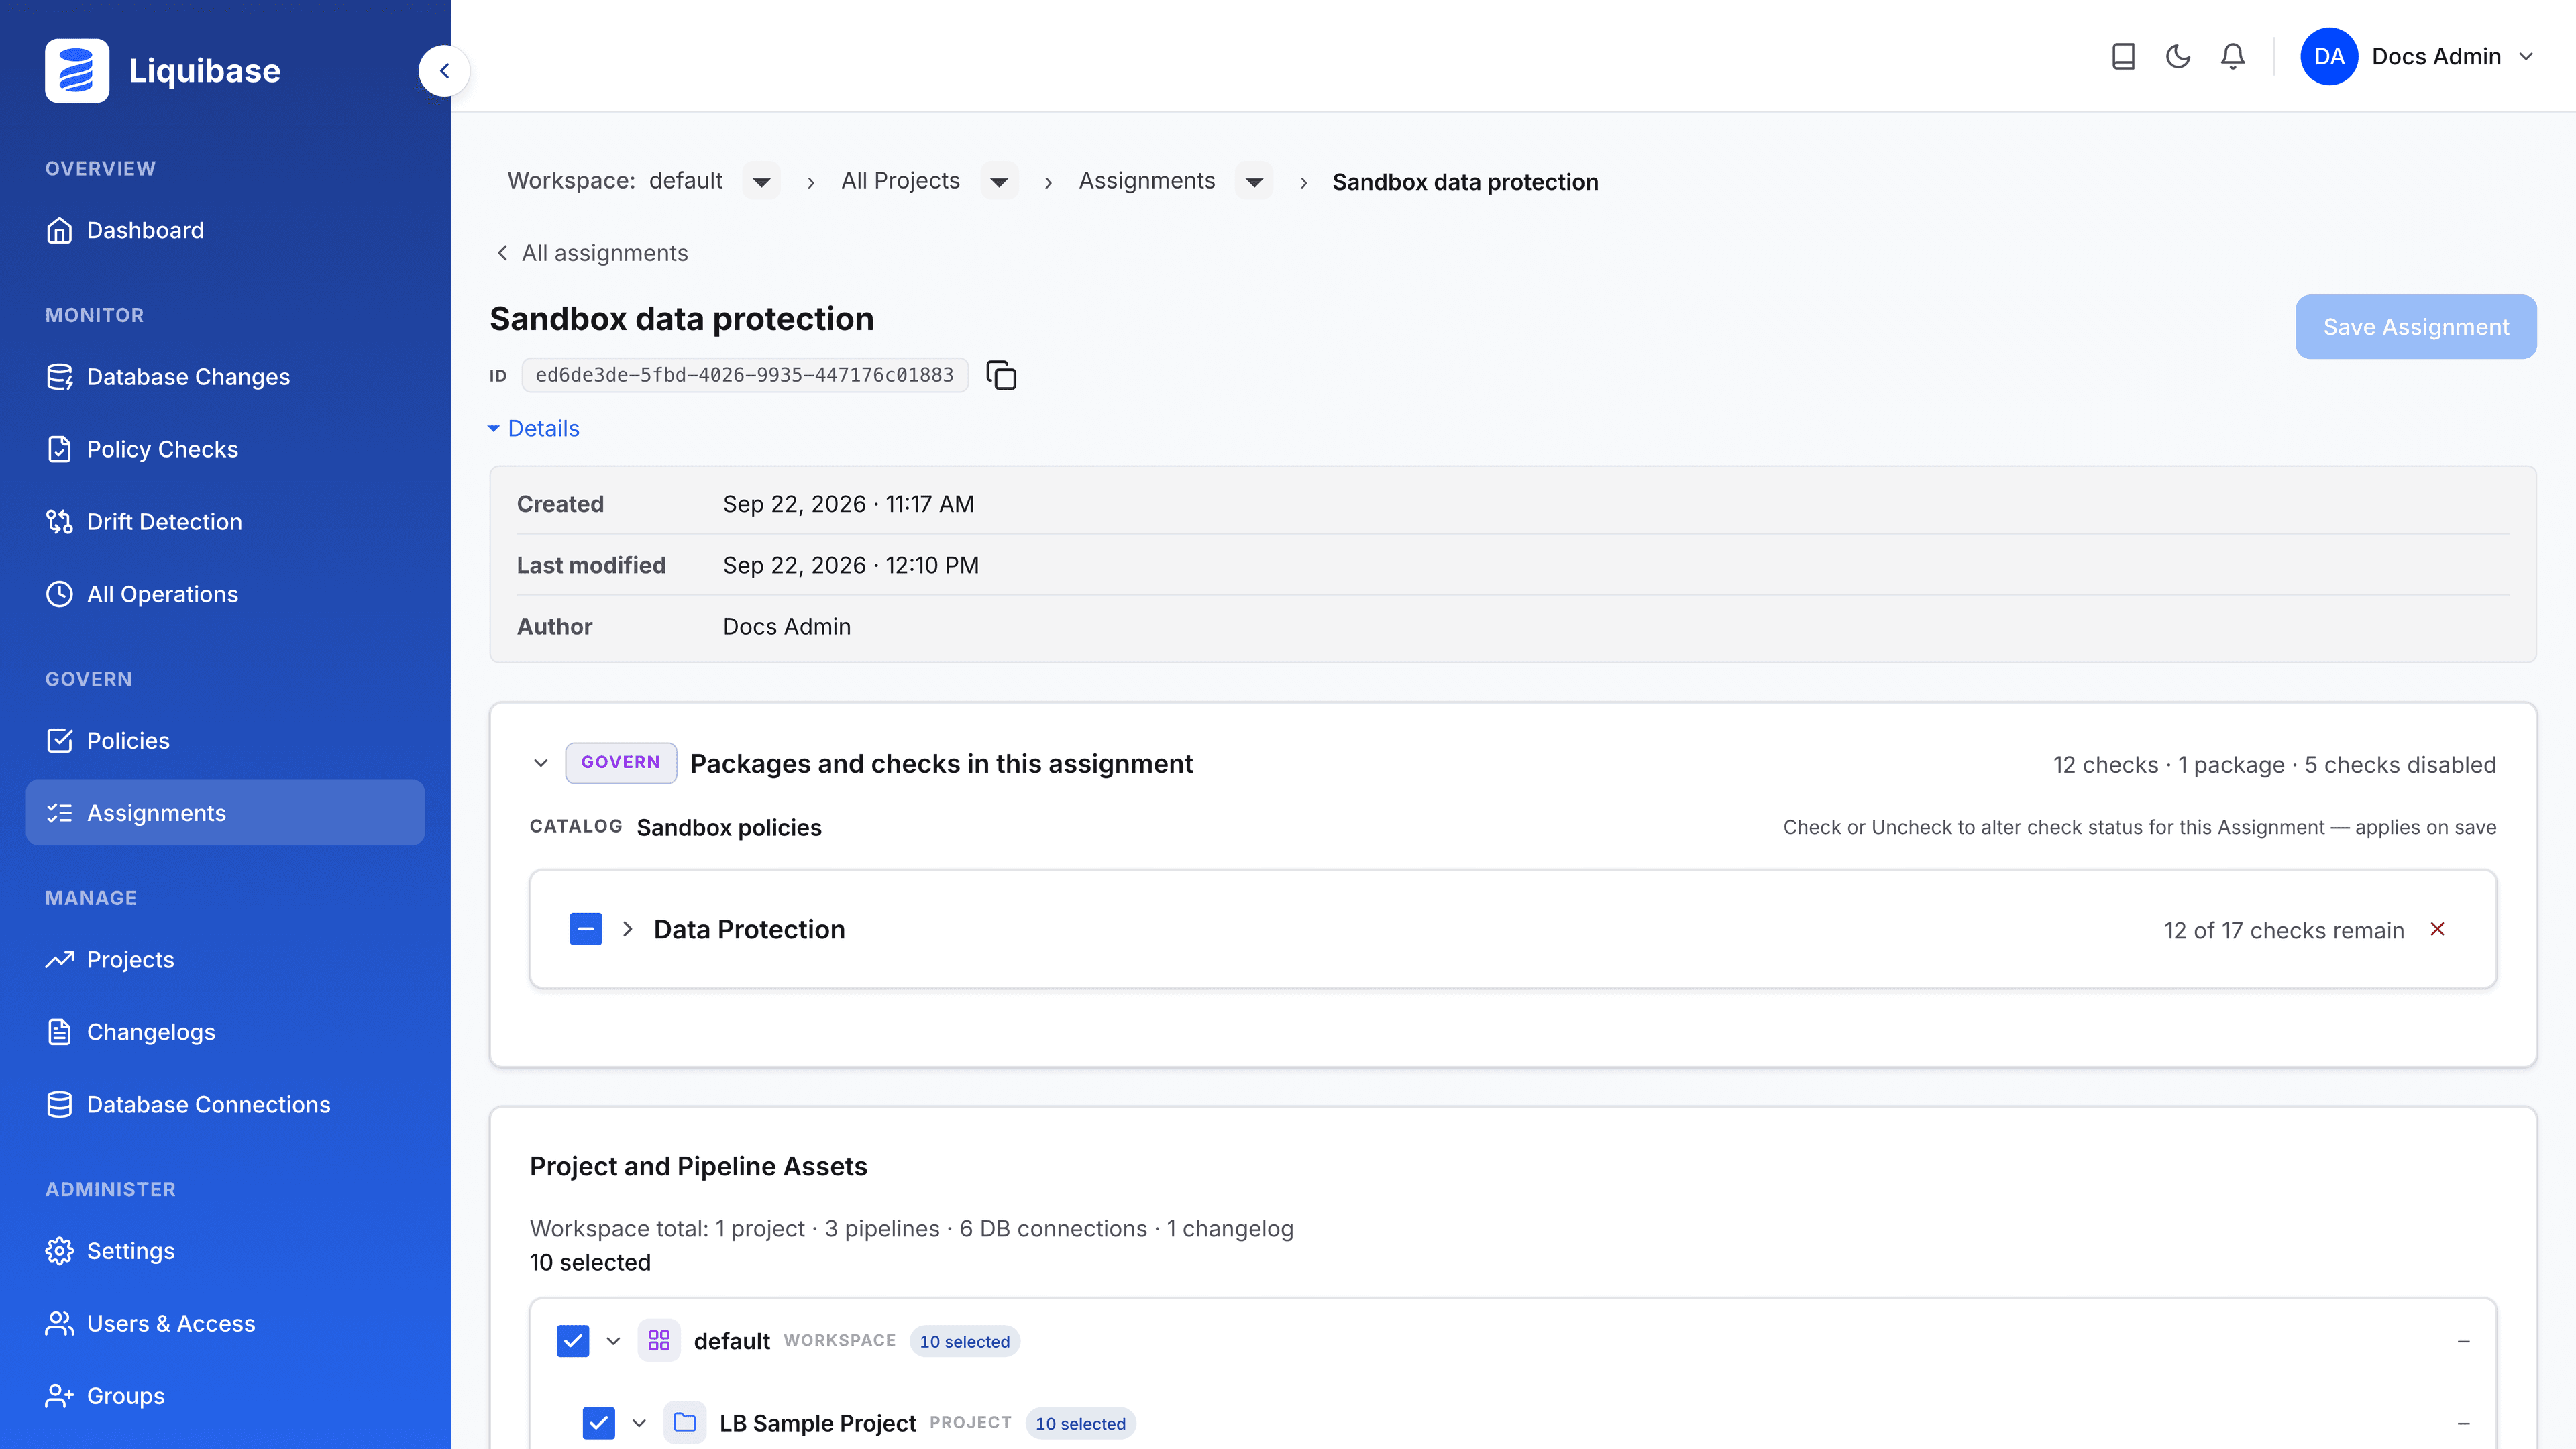
Select New Assignment, give it a name such as Sandbox data protection, and create it.
Select Manage on the assignment, then tick LB Sample Project in the asset tree. Selecting the project covers everything under it.
Select Save Assignment, review what the change affects, and confirm.
The assignment now shows its ID at the top of its detail page, with a control to copy it. Copy it now. That ID is the whole connection between the policy you just built and the command you are about to run.
Create a service principal token
The CLI authenticates to the server with a service principal token. In the left navigation, open Service Principals and select Create service principal.
Enter a Name you will recognize later, select LB Sample Project under Project scope, then select Create & generate token.
Select Copy token when the token appears. It is shown only once and cannot be retrieved afterwards.
Point your Liquibase project at the server
In the Liquibase project you built against the H2 sandbox, add these lines to liquibase.properties:
Be sure to:
Replace
your_api_keywith the token you copied in step 9. To keep the token out of the file, set it as theLIQUIBASE_PLATFORM_API_KEYenvironment variable instead and leave out theliquibase.platform.apiKeyline.Replace the host in
apiUrlif your server is not on this machine. The value is the address of your server with/apion the end, not the address of a particular endpoint.
liquibase.platform.enabled=true
liquibase.platform.apiUrl=http://localhost:3000/api
liquibase.platform.apiKey=your_api_key
One connection setting serves both jobs. It sends your operations to the server, and it is what the next steps use to fetch the policy.
Note: without liquibase.platform.enabled=true the commands still run normally and report nothing at all, which is the easiest thing to get wrong here.
Add a change the policy should catch
Add a changeset that drops a table to the end of your changelog. Dropping a table is exactly the kind of change the Data Protection package is there to notice.
Run the policy checks from the assignment
Run the checks against the assignment rather than a local file:
Be sure to:
Replace your_assignment_id with the ID you copied in step 8.
liquibase checks run --assignment-id=your_assignment_idLiquibase fetches the checks the assignment maps, runs them, and names the changeset that tripped one:
Nothing in that command names a check, a severity or a file. It names an assignment and the server decides the rest, so changing the assignment changes what the next run enforces, with no edit to your pipeline.
The command exited with code 2, which is the exit code for MAJOR, so a pipeline step running this would stop here. That is the severity you set in step 7, travelling from your catalog through the assignment to the run.
Note: by default only changelog checks run. Add --checks-scope=changelog,database to include the checks that inspect the database itself. Run checks with a policy assignment covers the command in full.
See the run in the web app
Open Policy Checks under Monitor. The run you just did is listed there, and the tiles above the list count the violation it found.
The policy was decided in one place, applied by a command that names nothing but an assignment, and recorded where the rest of your team can see it.