- Task
- Version · 6.0
- Govern
Set policy check severity and exit codes
Last updated: September 29, 2026
When you run policy checks manually, you can read the warnings from triggered checks in the CLI output. When your automation runs them, nobody is reading that output. The exit code is what your tools act on. Each triggered check returns the exit code you configured for its severity, and that code decides whether the job moves forward or stops.
Before you begin
Have the check in a package in a catalog your team owns, since checks in the Liquibase Default Catalog are read-only.
Note: When multiple checks are triggered, Liquibase returns the highest exit code of all the triggered checks. Automation tools can read it with echo $? on Linux or echo %ERRORLEVEL% on Windows, and the same rule holds inside a flow file. Policy check exit codes are set per check and are separate from the exit code Liquibase returns for a failed command.
Procedure
Open the check’s configuration
Under Govern, select Policies, then select Manage on your catalog to open Policy Checks Packages. Select Manage on the package that holds the check, then select See Current Configuration on the check’s row. The Severity row shows the current level with its exit code, for example INFO (0).
Note: Work in a catalog your team owns. The Liquibase Default Catalog is read-only, so Edit is switched off there and a check's severity cannot be changed until you copy it into a catalog of your own.
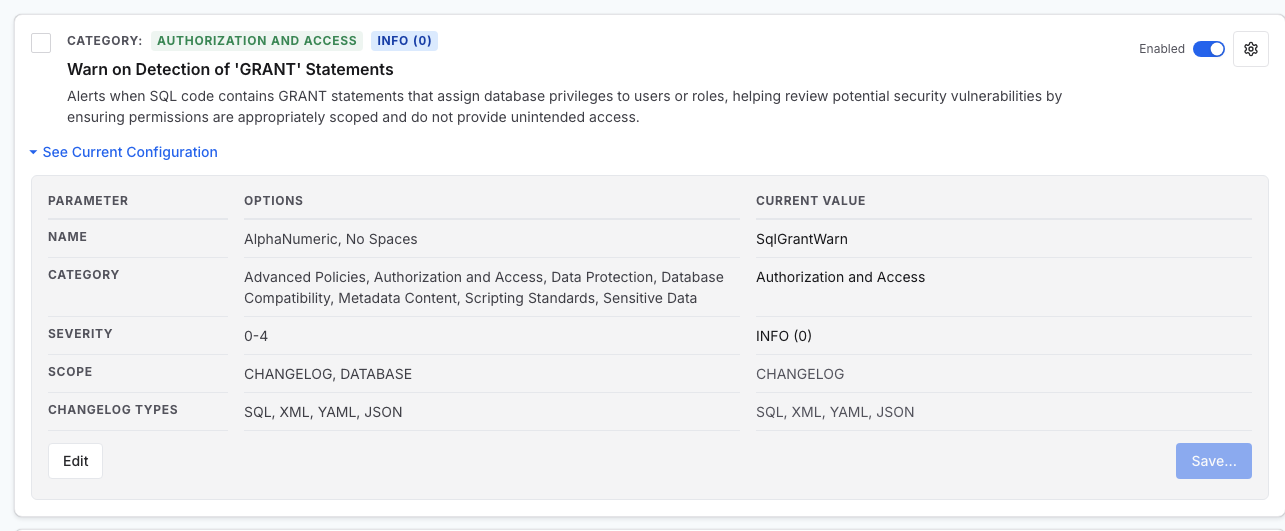
Set the severity
Select Edit. The Severity row becomes the five exit codes: 0 for INFO, 1 for MINOR, 2 for MAJOR, 3 for CRITICAL, and 4 for BLOCKER. Choose one, then select Save… to apply it. Anything above INFO returns a nonzero exit code, so it can stop a job.
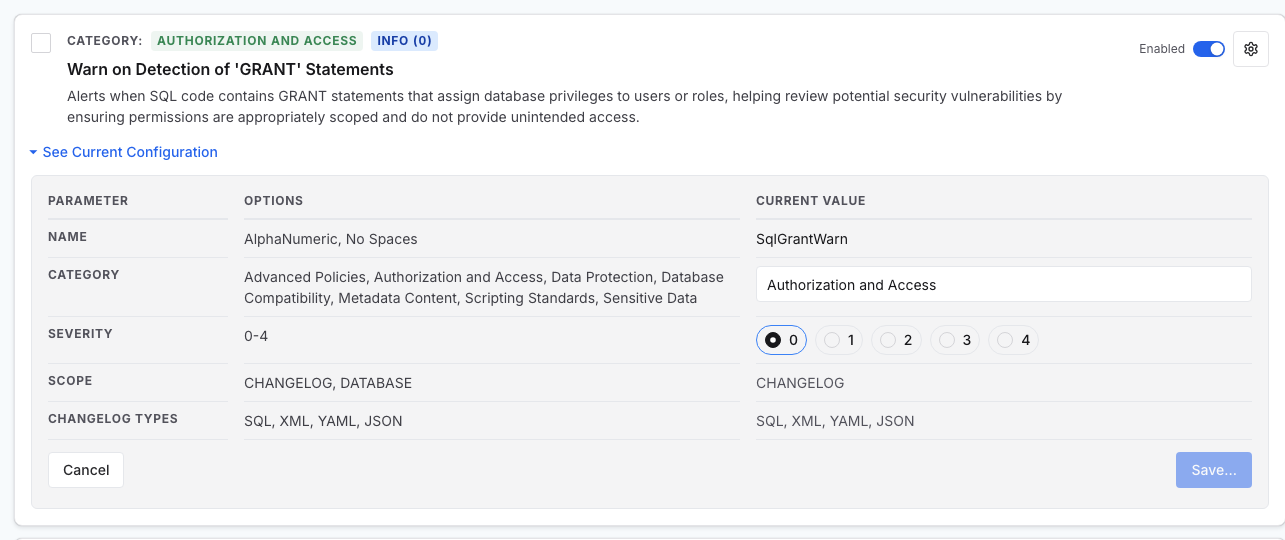
What to do next
Your pipeline now sees a nonzero exit code when the check fires. Stage that one environment at a time with policy check roll out best practices, warning in development before blocking in production. Then review policy coverage to confirm the check reaches the assets you expect.