- Task
- Version · 6.0
- Manage
Configure single sign-on with Microsoft Entra
Last updated: September 29, 2026
Authenticate a workspace against your own Microsoft Entra tenant, using either OpenID Connect or SAML 2.0, and test it before you turn it on.
Before you begin
You must be a member of the Administrators group. The account that set up the server is a member.
You need permission to register an application in your Microsoft Entra tenant.
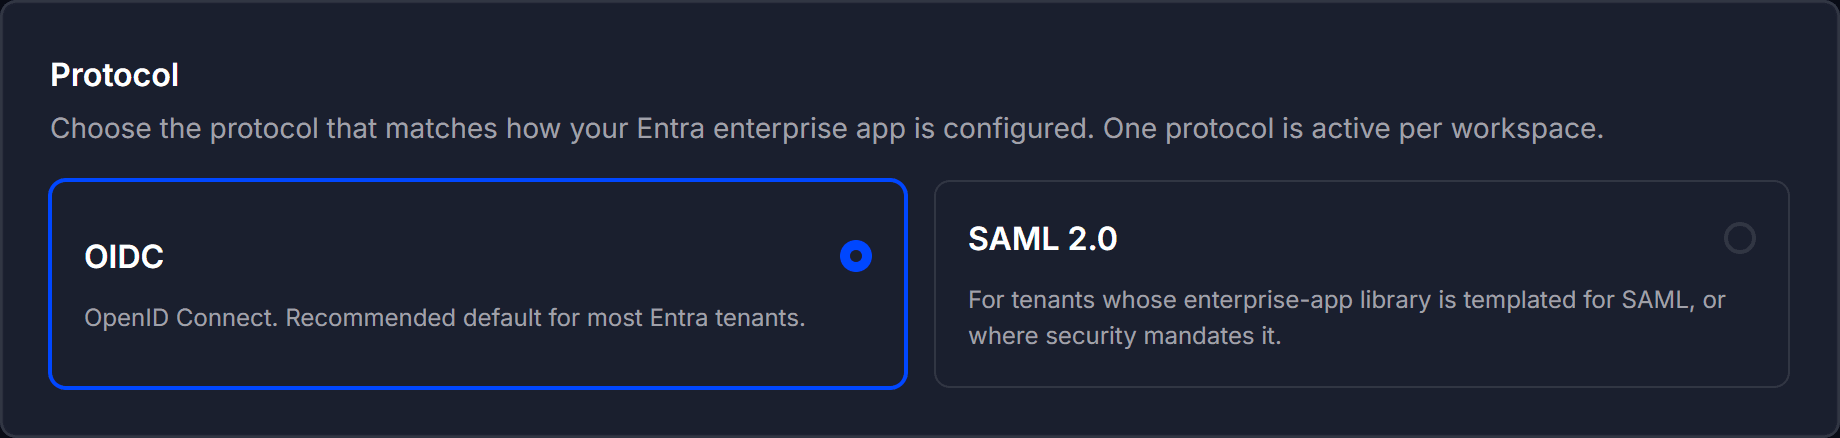
Decide which protocol to use. OpenID Connect is the recommended default for most Entra tenants. Use SAML 2.0 where your enterprise app library is templated for SAML, or where security policy requires it.
One protocol is active per workspace at a time.
Plan how each person gets their groups in Liquibase Secure, which does not use the groups your IT team manages in Microsoft Entra. Invite people into groups before they first sign in, or assign groups afterward to anyone who arrives in the Pending group.
Procedure
Open Single Sign-On
Go to Administer and select Single Sign-On.
The page authenticates this workspace against your organization's Microsoft Entra tenant.

Choose the protocol
Under Protocol, select OIDC (OpenID Connect) or SAML 2.0. One protocol is active per workspace.
Identify the provider
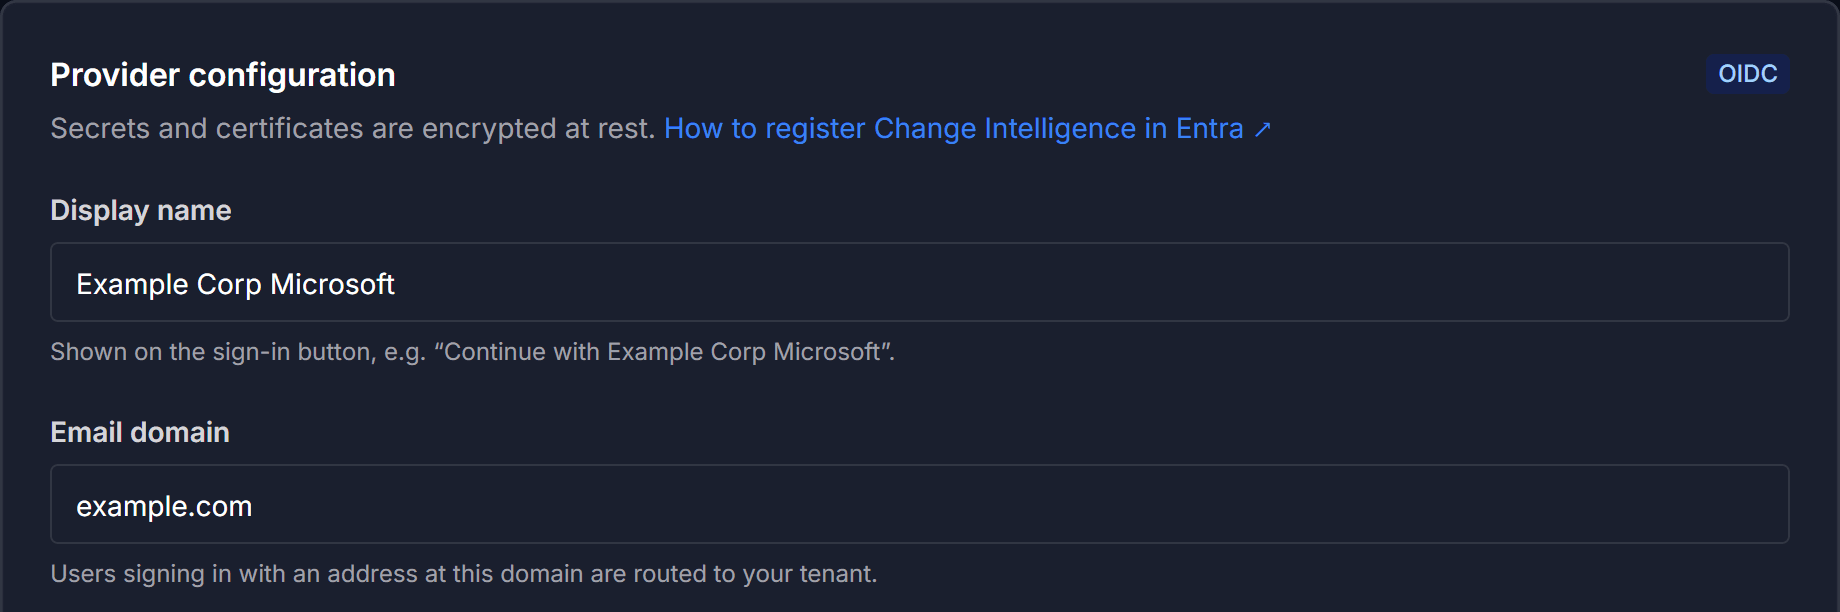
Both protocols share two fields:
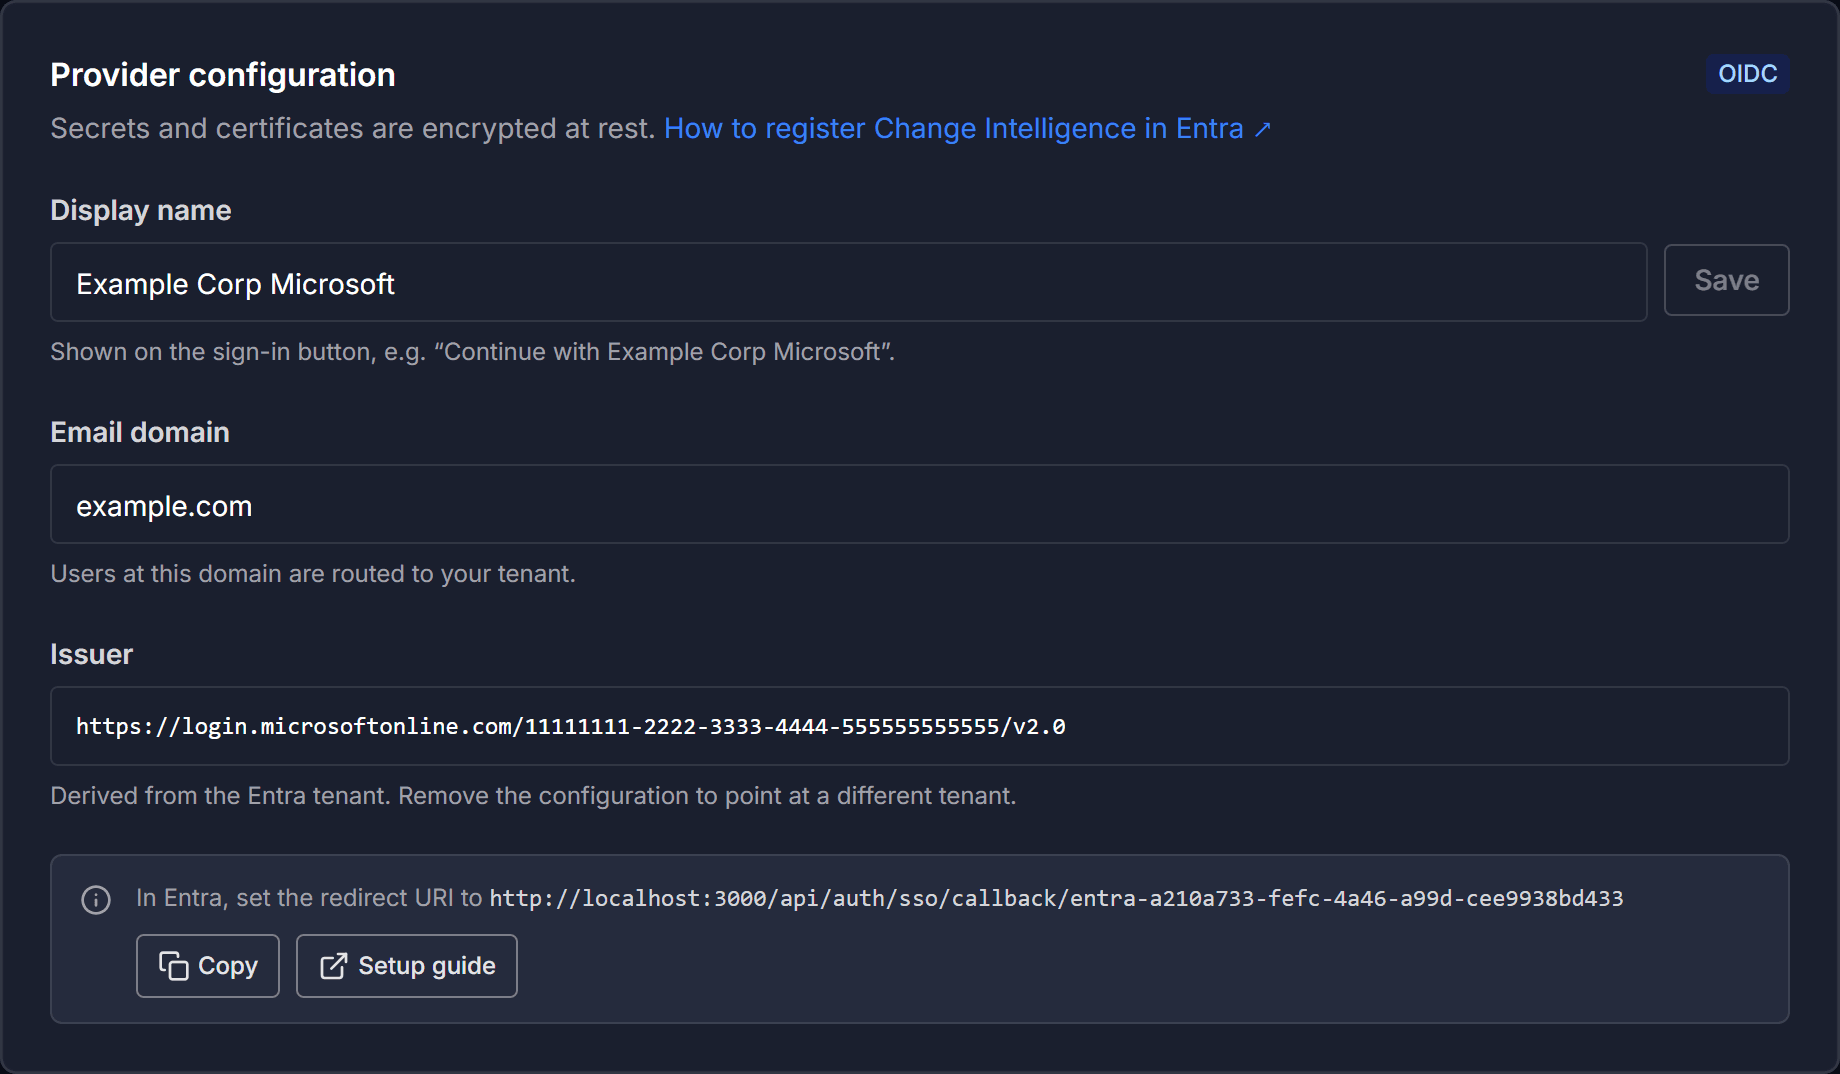
Display name is what your users see. The sign-in button reads Continue with followed by this name, so use something they recognize, such as
Example Corp Microsoft.Email domain routes users signing in with an address at that domain to your tenant. Enter a bare domain such as
example.com.
Supply the protocol details
OpenID Connect
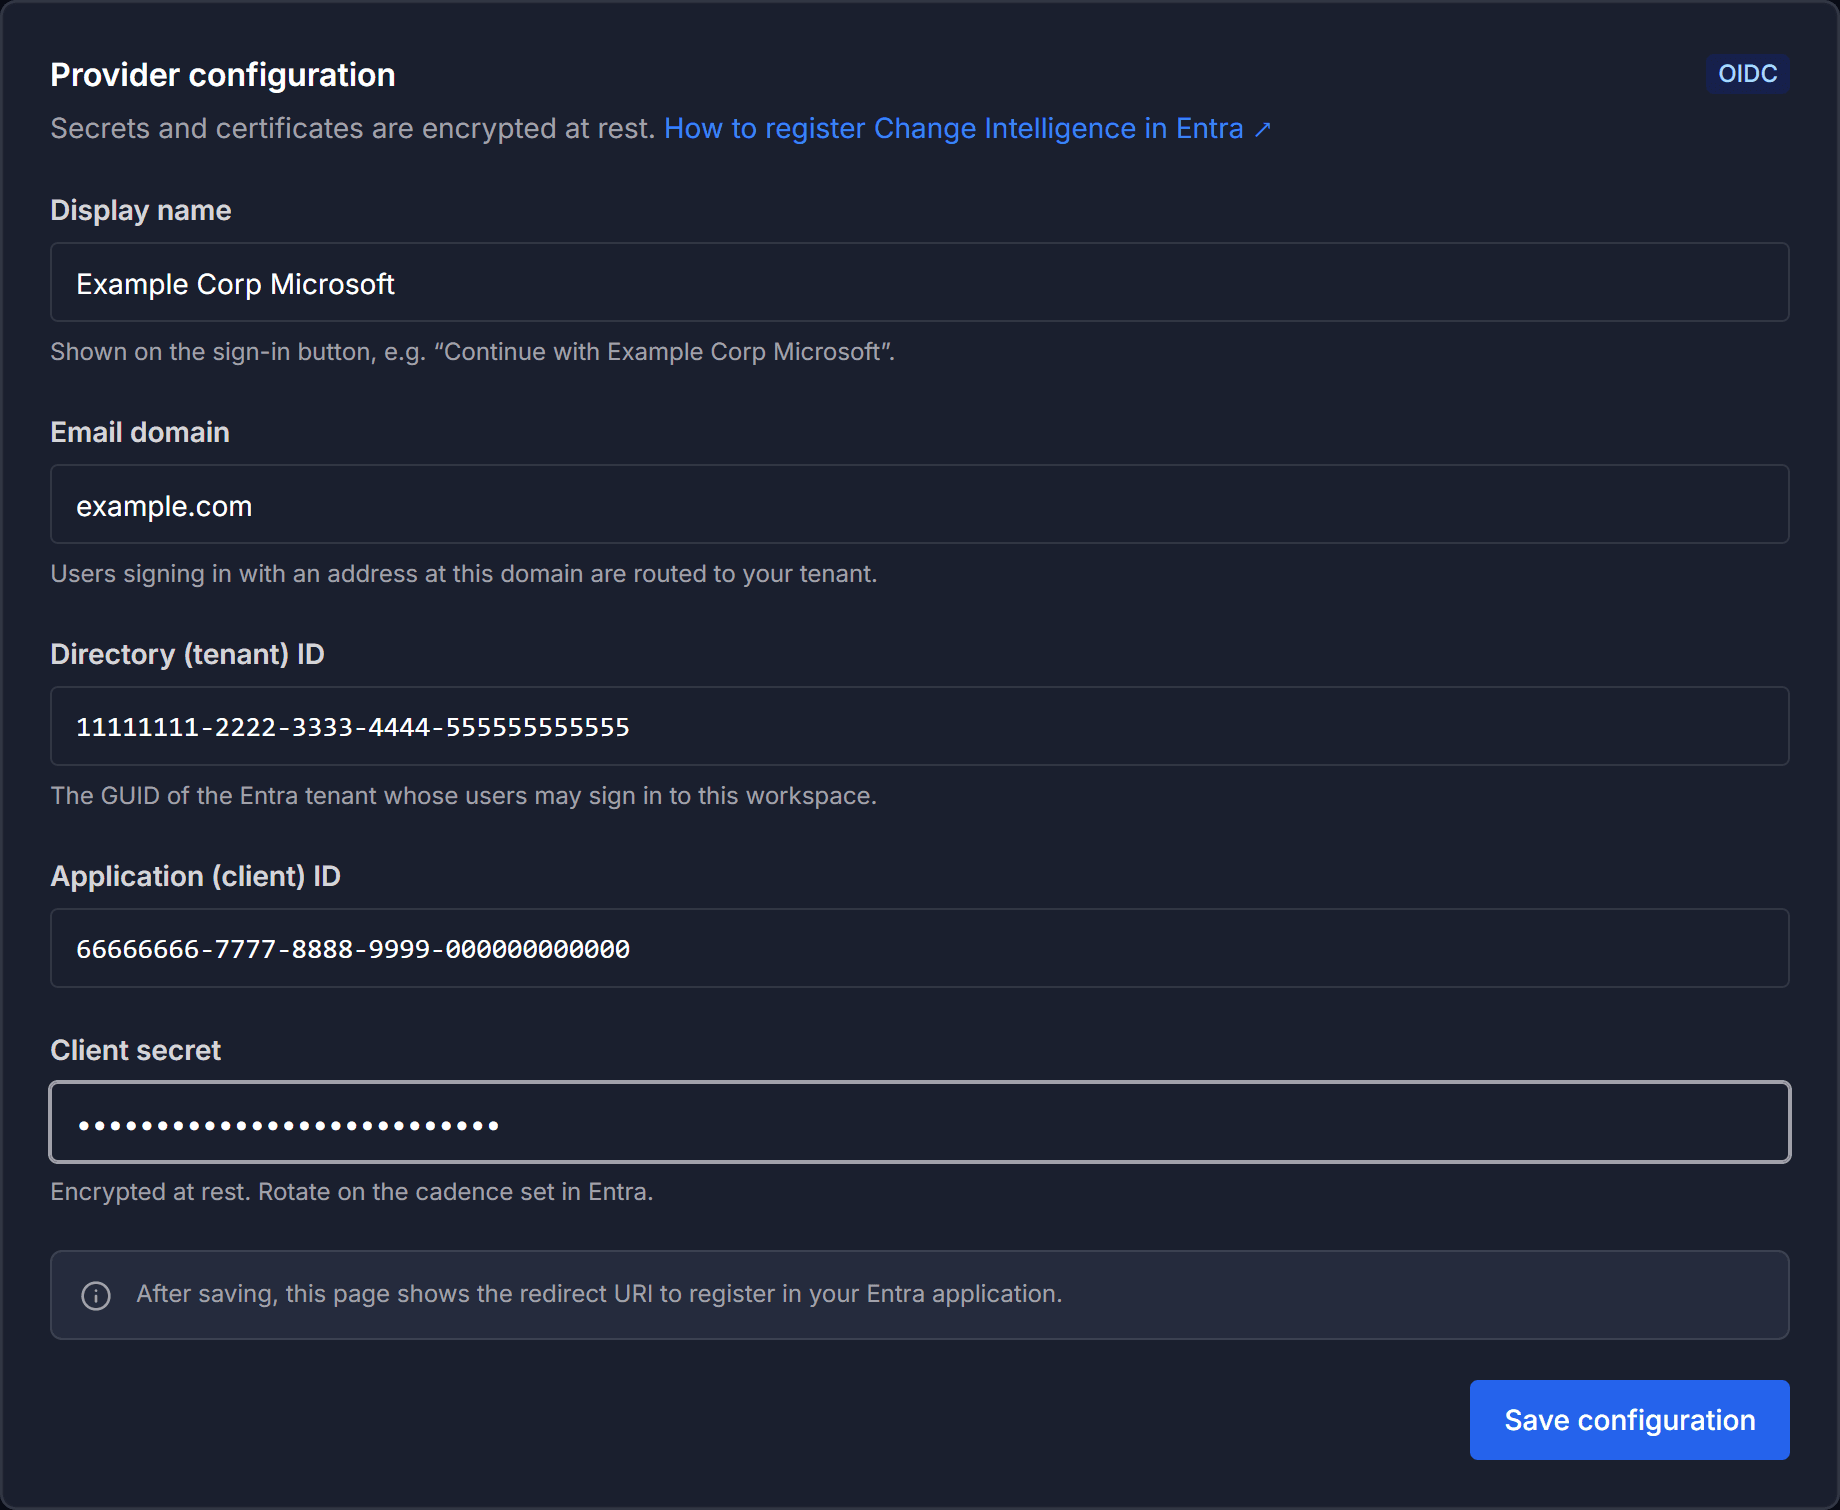
Fill in the values from your Entra app registration:
Directory (tenant) ID
Application (client) ID
Client secret
Be sure to:
Use the GUIDs from Entra for the tenant and application IDs. Both are validated as GUIDs.
SAML 2.0
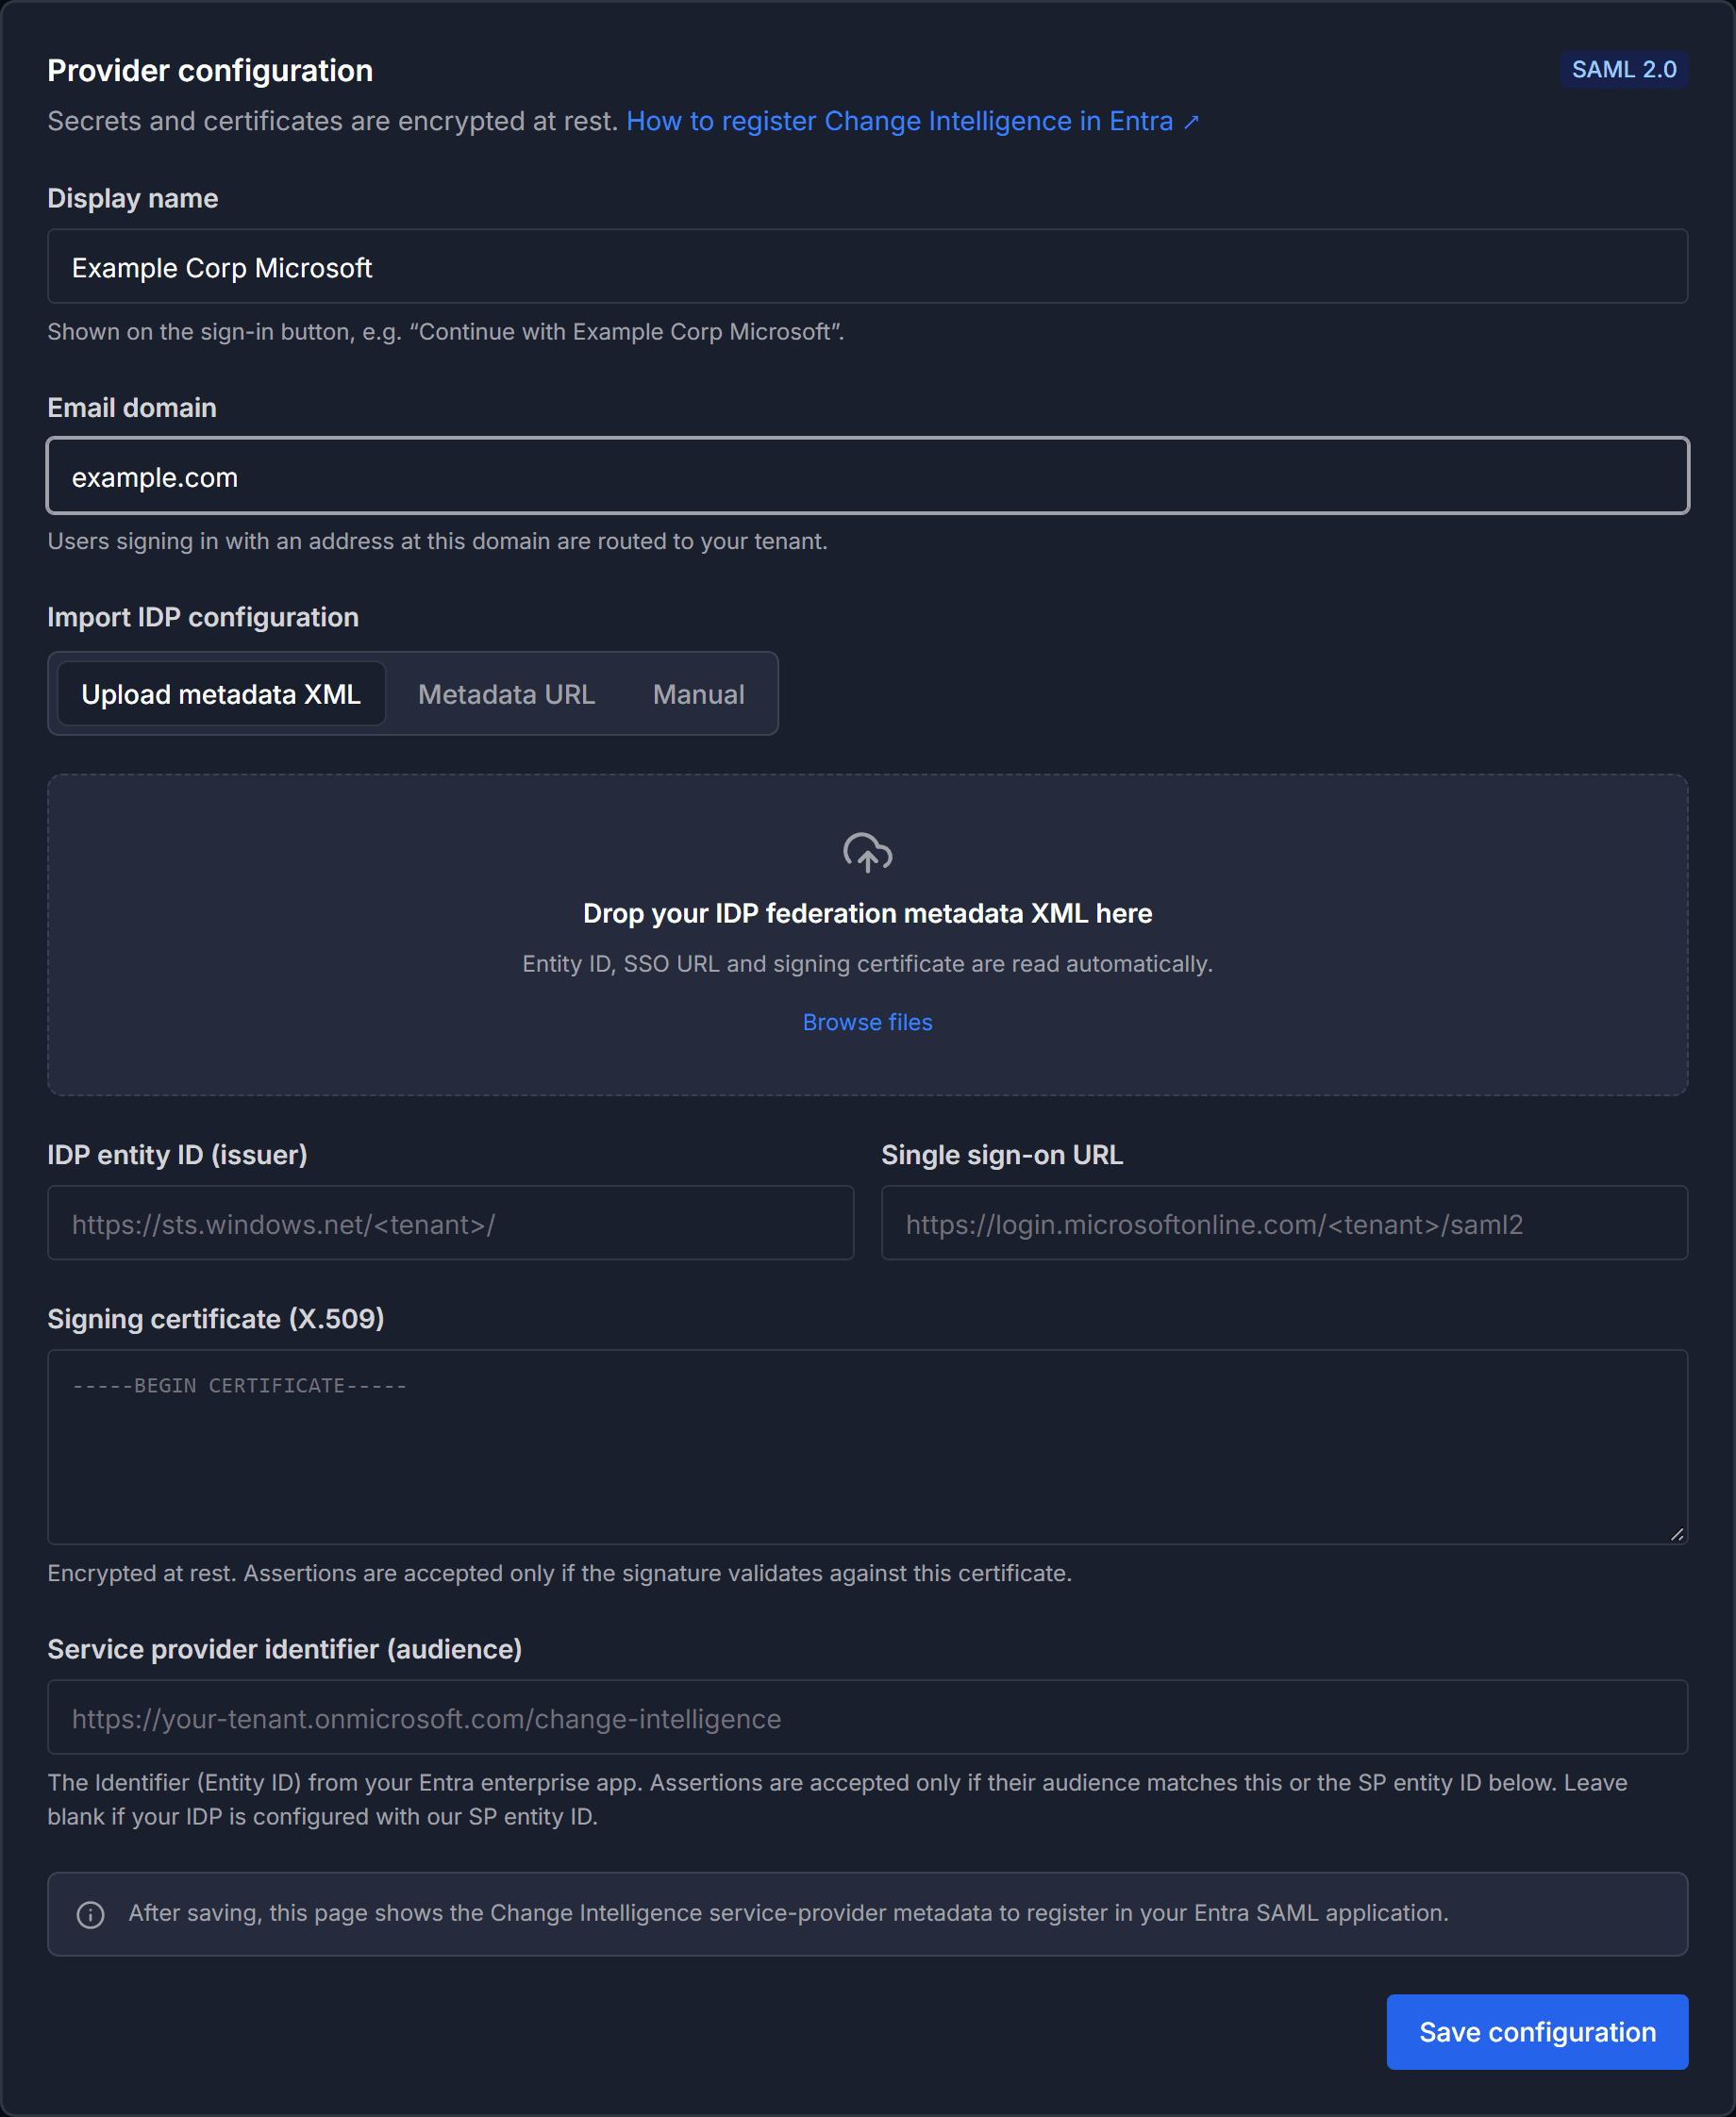
Under Import IDP configuration, supply your identity provider's federation metadata in whichever form you have it:
Upload metadata XML: drop your IDP federation metadata XML onto the import area, or select Browse files. The entity ID, sign-on URL, and signing certificate are read automatically.
Metadata URL: give the metadata URL, which is fetched and parsed when you save.
Manual: fill in the fields directly: IDP entity ID (issuer), Single sign-on URL, Signing certificate (X.509), and Service provider identifier (audience).
The signing certificate is encrypted at rest. Assertions are accepted only if the signature validates against it.
Save the configuration
Select Save configuration.
After you save, the page shows what to register in Entra: the redirect URI for OpenID Connect, or the service provider metadata for SAML 2.0.
Register Liquibase in Entra
OpenID Connect
Select Copy next to the redirect URI shown on the page, and add it to your Entra app registration.
SAML 2.0
Download the service provider metadata XML from the page and register those values in your Entra SAML enterprise app.

Test the configuration
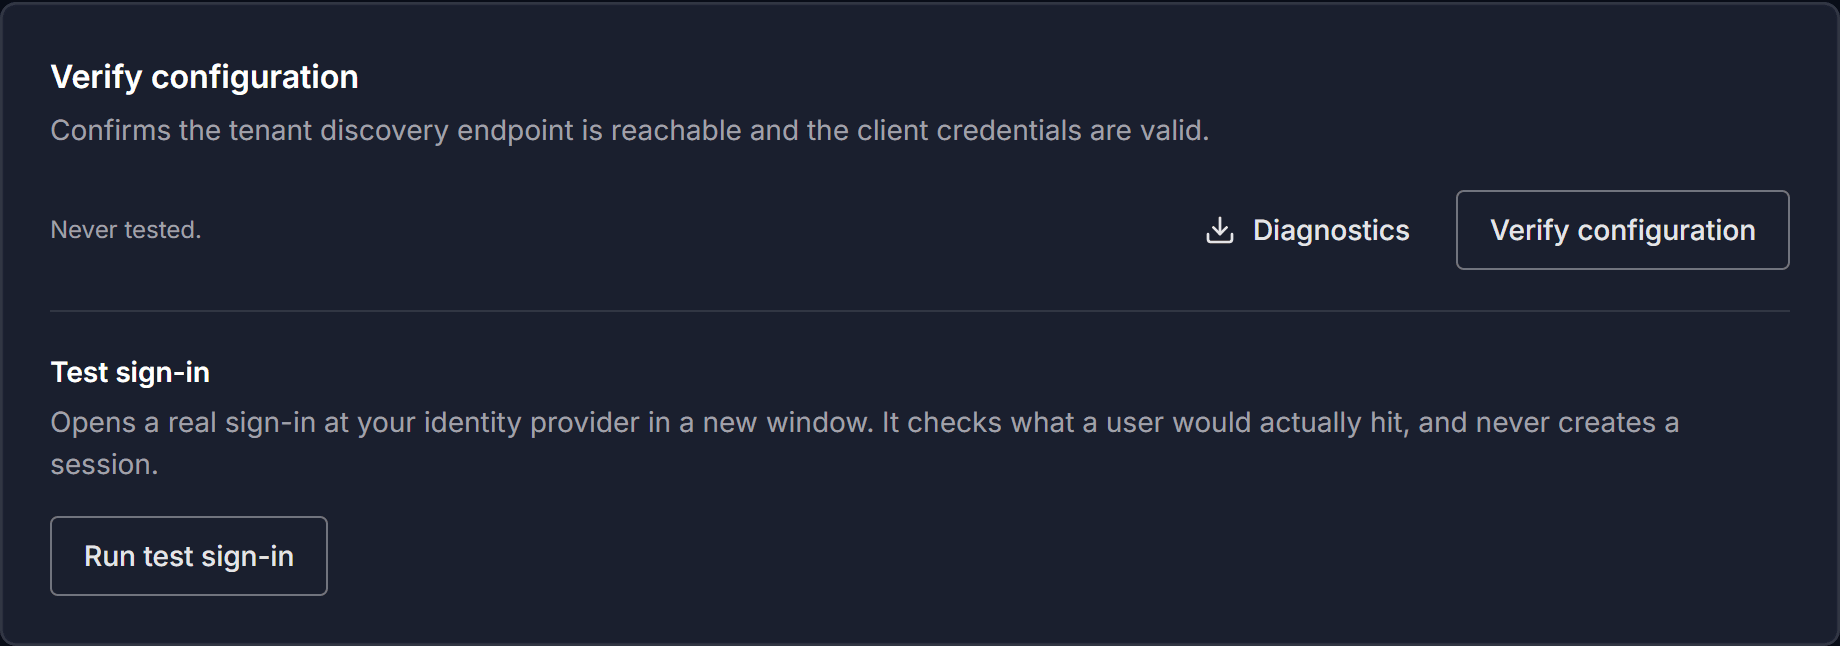
Select Verify configuration to confirm the tenant discovery endpoint is reachable and the client credentials are valid. Then select Run test sign-in to run a real sign-in against your tenant in a new window.
The test waits for you to finish signing in. It reports pass, warn, or fail, and each failure states what was expected against what was received. The test never creates a real session.
Select Diagnostics to download the results.
Be sure to:
Re-run the test after any change. A test taken before an edit is marked stale, and the page says the configuration changed after the test.
Enable single sign-on
Turn on the Enable Single Sign-On toggle.
Your sign-in button then appears on the sign-in page. Email and password sign-in stays available. Users you invited join the groups named in their invitation when they first sign in with single sign-on. Anyone else lands in the Pending group with no permissions until an administrator assigns them a group.
Liquibase Secure does not use the groups your IT team manages in Microsoft Entra, such as a Database Administrators group. Access comes only from groups in Liquibase Secure, either named in an invitation or assigned by an administrator.

Rotate an expiring credential
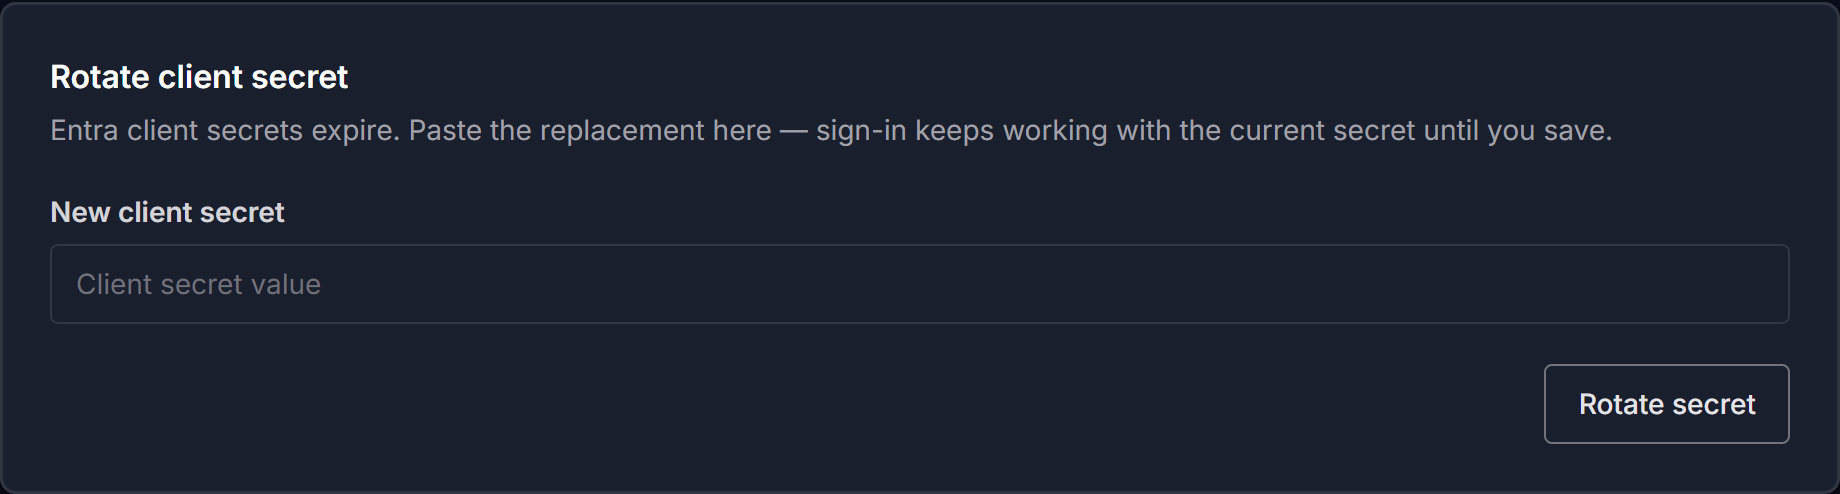
Credentials expire, and the page rotates whichever one the active protocol depends on.
SAML 2.0: paste the replacement signing certificate. Sign-in keeps working with the current certificate until you save.
OpenID Connect: under Rotate client secret, paste the replacement into New client secret and select Rotate secret. Sign-in keeps working with the current secret until you save.
Disable or remove a provider
To disable a provider, turn off the Enable Single Sign-On toggle. To remove it, select Remove under Remove configuration, then select Yes, remove configuration. Removing and registering again is also how you switch protocol or move to a different tenant.
Turning the provider off, or removing its configuration, signs out every user who authenticated through it. The sign-out takes effect on their next request rather than when their session would have expired.
Password users and users of a different provider are unaffected.
Note: This makes disabling a provider useful for offboarding or breach response, and disruptive during routine maintenance. Disabling a provider to change a setting logs that provider's users out.
